

A aquisição de veículos elétricos está a crescer rapidamente nos Estados Unidos, com os veículos totalmente elétricos a atingirem um recorde 7,91% de quota de mercado da TP3T no terceiro trimestre de 2023. Este crescimento torna uma casa Carregador de veículos eléctricos uma mais-valia cada vez maior para os novos proprietários. Para instalar um carregador de veículos elétricos hardware, deve primeiro selecionar um aparelho compatível com o seu veículo e com a instalação elétrica da sua casa. Muitos Fabricantes de carregadores para veículos eléctricos oferecem uma variedade de Soluções de carregamento de veículos eléctricos, desde potentes aparelhos de parede até simples carregadores portáteis para veículos eléctricos. A instalação do Carregador de veículos eléctricos. Este profissional garante que a instalação é segura e cumpre todas as normas elétricas. O processo envolve normalmente avaliar a capacidade do quadro elétrico da sua casa e instalar um novo circuito dedicado para a estação de carregamento.
Primeiro, conheça as opções de carregadores domésticos para veículos elétricos
Um proprietário de um veículo elétrico precisa de conhecer as opções disponíveis opções de carregamento antes de escolher um equipamento. A escolha tem um impacto direto na velocidade de carregamento, na complexidade da instalação e no custo total. O setor classifica o carregamento de veículos elétricos em três níveis principais. Cada nível oferece diferentes potências de saída e casos de utilização.
Explicação dos níveis dos carregadores de veículos elétricos
A principal diferença entre os níveis de carga é a O proprietário deve compreender a velocidade de carregamento e a, que determina a rapidez com que a bateria de um veículo elétrico pode ser recarregada.
Carregamento de nível 1 (120V)
O carregamento de Nível 1 utiliza uma tomada doméstica padrão de 120 volts, do mesmo tipo usado para um telemóvel ou computador portátil. Este método não requer nenhuma instalação especial. O proprietário do veículo elétrico utiliza simplesmente um conjunto de cabos portáteis que vem com a maioria dos veículos elétricos. No entanto, é extremamente lento. Um carregador de Nível 1 adiciona apenas cerca de 3 a 7 milhas de autonomia por hora de carregamento. Uma carga completa pode demorar mais de 22 horas, o que a torna pouco prática para condutores com longos trajetos diários. É mais adequada como opção de reserva ou para veículos híbridos recarregáveis com baterias de menor capacidade.
Carregamento de nível 2 (240V)
O Nível 2 é a solução mais comum e prática para um carregador doméstico de veículos elétricos. Estas unidades utilizam um circuito de 240 volts, semelhante ao de uma máquina de secar roupa ou de um forno elétrico. Esta tensão mais elevada permite velocidades de carregamento muito mais rápidas, adicionando normalmente entre 16 e 120 km de autonomia por hora. Uma carga completa para uma bateria típica de um veículo elétrico pode ser concluída em apenas algumas horas, geralmente durante a noite. Este nível requer a instalação profissional de um circuito dedicado e da própria estação de carregamento.
Carregamento rápido DC (Nível 3)
O carregamento rápido em corrente contínua, ou Nível 3, oferece o carregamento mais rápido disponível. Estas potentes estações de carregamento conseguem carregar a bateria de um veículo elétrico até 80% em menos de 20 minutos. Conseguem-no convertendo a corrente alternada em corrente contínua externamente e fornecendo-a diretamente à bateria, contornando o conversor de bordo do automóvel, que é mais lento. Devido à sua potência de saída extremamente elevada (30-400+ kW) e ao seu custo elevado, os carregadores rápidos de corrente contínua não são instalados em residências. Encontram-se exclusivamente em estações de carregamento públicas ao longo de autoestradas e em centros urbanos.
Por que razão o Nível 2 é o padrão para o carregamento doméstico
Para a maioria dos proprietários de veículos elétricos, um carregador de nível 2 oferece o equilíbrio ideal entre velocidade, custo e comodidade para o uso diário.
Velocidades de carregamento mais rápidas
A principal vantagem do carregamento de Nível 2 é a sua rapidez. Enquanto um carregador de Nível 1 pode demorar mais de 22 horas a carregar um Bateria de 60kWh, um carregador típico de nível 2 com 7,4 kW consegue fazer o mesmo em cerca de 8 horas. Isto garante uma bateria totalmente carregada todas as manhãs, mesmo após um longo dia de condução. A diferença de desempenho é substancial.

Maior comodidade e eficiência
Um carregador de Nível 2 transforma a experiência de possuir um veículo elétrico. Elimina a ansiedade relacionada com a autonomia nas deslocações diárias, proporcionando um carregamento noturno rápido e fiável. Esta comodidade garante que o veículo está sempre pronto para as deslocações ou recados do dia seguinte. A eficiência do carregamento de Nível 2 significa menos tempo de espera e mais tempo a conduzir, tornando-o o padrão de referência para instalações residenciais.
Passo 1: Avaliar o sistema elétrico da sua casa
A instalação de um carregador para veículos elétricos é um projeto elétrico de grande envergadura. Antes de adquirir qualquer equipamento, o proprietário deve, em primeiro lugar, avaliar a instalação elétrica da sua casa. Este primeiro passo crucial determina se a infraestrutura existente é capaz de suportar com segurança a carga adicional de um carregador de Nível 2. Uma avaliação minuciosa evita potenciais riscos e surpresas dispendiosas no futuro.
Avalie o seu quadro elétrico (caixa de disjuntores)
O quadro elétrico, ou caixa de disjuntores, é o coração do sistema elétrico de uma casa. É responsável pela distribuição de energia a todos os circuitos. Um eletricista irá inspecioná-lo para verificar a sua capacidade e o espaço disponível.
Verificar a amperagem do disjuntor principal
O disjuntor principal é o interruptor de maior dimensão no quadro elétrico, normalmente situado na parte superior ou inferior. Este disjuntor indica a amperagem total que a sua casa pode consumir da rede elétrica. O número nele impresso (por exemplo, 100A, 150 A, 200 A) indica a capacidade total do painel. Este valor é um fator crucial. Ajuda a determinar se o painel consegue suportar a carga contínua de um carregador de veículos elétricos, para além dos eletrodomésticos já existentes na casa.
Identificar o espaço para um novo disjuntor de 240 V
Um carregador de nível 2 requer um circuito dedicado de 240 volts. Este circuito necessita de um novo disjuntor “bipolar”, que ocupa dois espaços físicos adjacentes no quadro. Um eletricista verificará se existem dois espaços livres, lado a lado. Se o quadro estiver cheio, poderá ser possível agrupar os circuitos existentes utilizando disjuntores “em tandem” para libertar espaço. Em alguns casos, um pequeno subquadro pode ser uma solução viável.
Determine a capacidade de abastecimento da sua casa
A capacidade de fornecimento de uma habitação refere-se à quantidade total de eletricidade fornecida pela empresa de eletricidade. Esta capacidade deve ser suficiente tanto para as necessidades atuais da habitação como para o novo carregador de veículos elétricos.
Compreender a diferença entre um serviço de 100 A e um de 200 A
A maioria das casas modernas dispõe de uma ligação elétrica de 200 amperes, o que geralmente é suficiente para instalar um carregador de veículos elétricos. Muitas casas mais antigas ou de menor dimensão, no entanto, podem ter apenas Fornecimento de 100 A ou mesmo de 60 A. Uma instalação elétrica de 100 A costuma ser suficiente para alimentar um carregador de veículos elétricos, mas isso depende em grande parte das outras cargas elétricas da casa, como aquecimento elétrico ou uma banheira de hidromassagem. É necessário que um eletricista confirme se a instalação elétrica consegue suportar o aumento da procura com segurança.
Quando é necessária uma atualização do quadro elétrico
É necessário atualizar o quadro elétrico se o quadro existente não tiver capacidade suficiente para o novo carregador. Os sinais de que é necessária uma atualização incluem um disjuntor principal de baixa amperagem (por exemplo, 60 A ou 100 A numa casa com elevado consumo elétrico) ou um quadro elétrico fisicamente cheio, sem espaço para um novo disjuntor de 240 V. Este é um projeto mais complexo e dispendioso, mas garante que o sistema elétrico da casa é seguro e está preparado para o futuro.
A importância de um cálculo profissional da carga
Um cálculo profissional da carga é uma etapa imprescindível, realizada por um eletricista certificado. Este procedimento fornece uma análise detalhada da procura elétrica total de uma habitação, para garantir que o sistema não fica sobrecarregado.
O que é um cálculo da carga elétrica?
O cálculo da carga elétrica é um processo sistemático definido pelo Código Elétrico Nacional (NEC). Um eletricista faz um inventário de todas as principais cargas elétricas da casa para determinar o consumo total de energia. Isto inclui os aparelhos fixos e as potenciais cargas futuras. O cálculo tem em conta elementos como:
- Frigorífico e forno
- Sistema de climatização
- Aquecedor de água
- Máquina de lavar louça e micro-ondas
- Tomadas para iluminação e uso geral
Segurança em primeiro lugar: Este cálculo não é uma simples estimativa. Trata-se de um procedimento formal que garante que o novo circuito do carregador de veículos elétricos não exceda a capacidade de segurança do quadro elétrico ou da ligação principal da habitação.
Por que razão este passo é fundamental para a segurança
Este cálculo é fundamental para evitar sobrecargas perigosas. A instalação de um dispositivo de alta potência, como um carregador de veículos elétricos, sem uma avaliação adequada pode provocar o disparo dos disjuntores, danificar os aparelhos ou, na pior das hipóteses, causar um incêndio elétrico. Um cálculo profissional da carga garante que a instalação cumpre todas as normas de segurança. Protege o proprietário, a sua propriedade e o seu novo veículo elétrico.
Passo 2: Escolha o ponto de carregamento doméstico adequado para o seu veículo elétrico

Depois de confirmar que a instalação elétrica da casa suporta uma nova carga, o próximo passo é Escolher a estação de carregamento doméstica ideal para veículos elétricos. O mercado oferece uma vasta gama de opções. Um comprador deve ter em conta a potência, o design físico e as funcionalidades inteligentes para encontrar a opção mais adequada ao seu veículo e estilo de vida.
Potência de saída e velocidade de carregamento
A potência de saída de um carregador, medida em amperes (A), determina diretamente a rapidez com que este consegue recarregar a bateria de um veículo elétrico.
Opções de amperagem (16 A a 48 A)
Os carregadores de nível 2 estão disponíveis em várias intensidades de corrente, normalmente a partir de 16A até 48 A. Uma amperagem mais elevada proporciona mais potência, o que resulta num carregamento mais rápido. A velocidade é frequentemente medida em quilómetros de autonomia adicionados por hora.
| Amperagem | Autonomia adicional por hora (aprox.) |
|---|---|
| 16A | cerca de 24 km |
| 32A | cerca de 30 milhas |
| 48A | cerca de 72 km |
Um carregador de 32 A ou 40 A é uma escolha comum na maioria das residências. Proporciona um aumento substancial da velocidade em comparação com o carregamento de Nível 1, sem exigir, na maioria dos casos, uma grande atualização da instalação elétrica.
Escolher o carregador adequado para o sistema de carregamento de bordo do seu carro
Um veículo elétrico possui um carregador integrado que converte a corrente alternada da tomada em corrente contínua para a bateria. Este componente tem uma taxa máxima de aceitação. Um carro com um carregador integrado de 7,4 kW não pode carregar mais rapidamente, mesmo que esteja ligado a uma estação de 11 kW (48 A). O proprietário deve escolher um carregador doméstico para veículos elétricos que corresponda ou exceda ligeiramente a taxa máxima de carregamento CA do seu veículo, para garantir um desempenho ideal sem gastar em excesso com energia desnecessária.
Tipos de carregadores físicos
Os carregadores também diferem no que diz respeito à instalação física e à configuração dos cabos. Estas opções afetam a comodidade, a flexibilidade e a complexidade da instalação.
Ligação fixa vs. ligação por ficha (NEMA 14-50)
O proprietário pode optar por um aparelho com ligação fixa ou por um modelo com ficha.
- Cableado: Um eletricista liga o carregador diretamente ao circuito. Esta instalação permanente é frequentemente necessária para carregadores de alta amperagem (acima de 40 A) e pode ser mais fiável. Evita potenciais problemas com disparos intempestivos, o que pode acontecer quando o GFCI interno de um carregador com ficha entra em conflito com um disjuntor GFCI obrigatório na tomada.
- Plug-in: Estes carregadores utilizam uma ficha de alta resistência, como a NEMA 14-50. Isto proporciona flexibilidade, uma vez que o proprietário pode desligar o aparelho e levá-lo consigo. É uma excelente opção para quem vive em arrendamento ou para quem possa vir a mudar de casa.
Com fio (cabo ligado) vs. Sem fio (tomada)
Esta escolha resume-se a uma questão de conveniência versus estética.
- Conectado: O cabo de carregamento está fixado de forma permanente ao aparelho. Isto é extremamente prático; basta ao condutor estacionar e ligar o cabo.
- Sem cabo fixo: O aparelho tem uma tomada e o condutor utiliza um cabo separado (geralmente aquele que fica guardado na bagageira do carro) para o ligar. Isto confere um aspeto mais elegante quando não está a ser utilizado.
Caraterísticas inteligentes e conetividade
Carregadores modernos de fornecedores como a TPSON oferecem funcionalidades avançadas que melhoram a experiência de carregamento e permitem poupar dinheiro.
Wi-Fi, controlo por aplicação e programação
Os carregadores inteligentes ligam-se à rede Wi-Fi doméstica. Isto permite ao proprietário monitorizar e controlar as sessões de carregamento através de uma aplicação para smartphone. Uma das principais vantagens é a programação. O proprietário pode programar o carregador para iniciar o carregamento durante as horas de menor consumo, quando as tarifas de eletricidade são mais baixas.
Tarifas dos serviços públicos e integração da resposta à procura
Alguns carregadores avançados podem integrar-se diretamente com as tarifas de energia das empresas de serviços públicos. O software do carregador faz automaticamente otimiza o horário de carregamento para utilizar a eletricidade mais barata disponível. Isto garante que o carro fica pronto a uma hora determinada, minimizando simultaneamente os custos.
Ligação a sistemas solares domésticos
Nas casas equipadas com painéis solares, determinados carregadores inteligentes podem dar prioridade à utilização do excedente de energia solar. O sistema direciona a energia gratuita e limpa proveniente do sol para a bateria do veículo elétrico. Isto maximiza o autoconsumo de energia solar e reduz ainda mais a dependência da rede elétrica.
Passo 3: Planear o local de instalação do carregador de veículos elétricos

O planeamento estratégico da localização do carregador é essencial para conveniência no dia a dia e a eficiência da instalação. O proprietário deve consultar o seu eletricista para identificar o local ideal. Esta decisão tem impacto tanto na custo do projeto e a facilidade das futuras sessões de carregamento.
Escolher o melhor local para o seu carregador
Encontrar o melhor lugar para instalar um carregador de veículos eléctricos implica encontrar um equilíbrio entre a acessibilidade, a segurança e o design do veículo.
Perto do seu lugar de estacionamento
O carregador deve ser instalado o mais próximo possível do local onde o veículo elétrico costuma ficar estacionado. Isto garante que o cabo de carregamento chegue facilmente à tomada do veículo, sem ficar esticado nem criar risco de tropeços. A maioria dos cabos de carregamento padrão tem cerca de 5,5 a 7,6 metros de comprimento. Uma unidade bem posicionada facilita a rotina diária de ligar o veículo à tomada.
Tendo em conta a localização da porta de carregamento do seu carro
Os veículos elétricos têm tomadas de carregamento em diferentes locais — algumas na parte da frente, outras na lateral e outras ainda na traseira. O proprietário deve ter em conta a localização específica da tomada do seu veículo ao escolher a parede onde instalar o carregador. Isto evita a necessidade de estacionar numa posição incómoda ou de passar o cabo por cima do veículo.
Instalação no interior (garagem) vs. instalação no exterior
A escolha entre uma instalação no interior ou no exterior depende da disposição do imóvel e da preferência do proprietário.
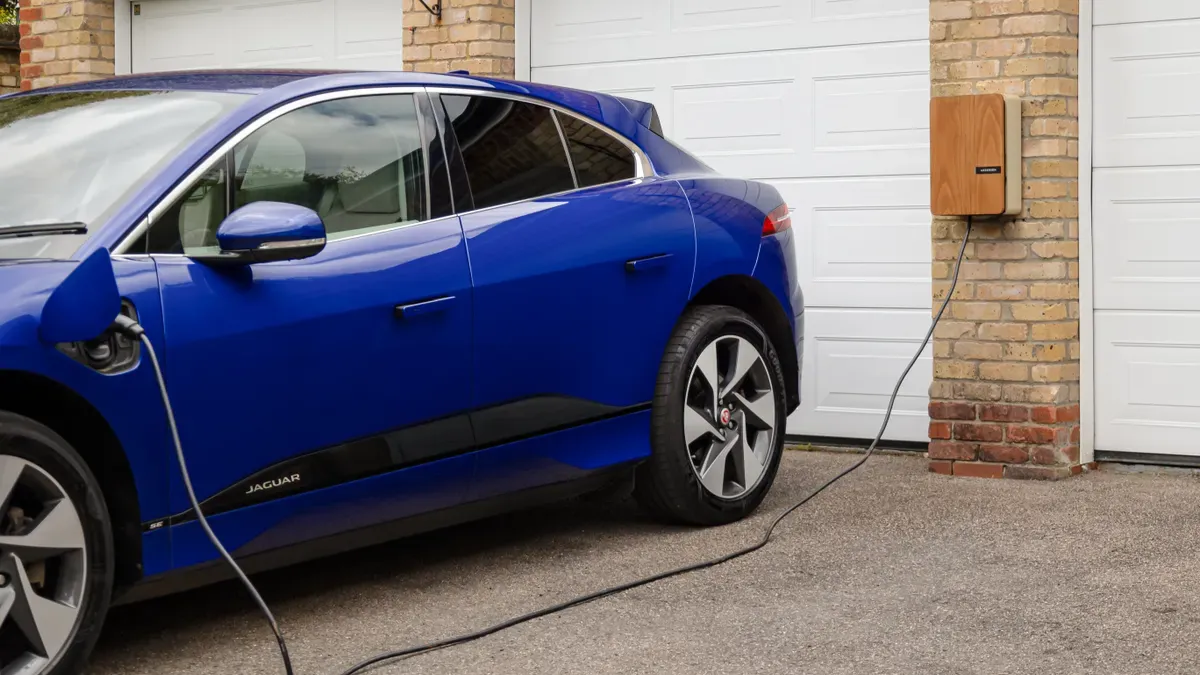
- No interior (garagem): A garagem é frequentemente o melhor local para instalar um carregador de veículos elétricos. Protege o aparelho das intempéries, de possíveis atos de vandalismo e de temperaturas extremas, o que pode prolongar a sua vida útil. É importante garantir uma ventilação adequada para dissipar o calor gerado durante o carregamento.
- Ao ar livre: Se não houver garagem disponível, a instalação no exterior é uma opção perfeitamente viável. Neste caso, o proprietário deve escolher um carregador com um índice de proteção contra a penetração (IP) elevado, como IP65. Esta classificação garante que o aparelho está protegido contra o pó e a chuva. O carregador e a sua cablagem também devem ser resistentes aos raios UV, para evitar danos causados pelo sol.
Planejando o Trajeto da Fiação
Um eletricista irá traçar o percurso mais eficiente para o cabo elétrico, o que constitui uma parte essencial do plano de instalação.
Percurso do quadro de distribuição até ao carregador
O percurso ideal para a instalação elétrica é o caminho mais curto e direto entre o quadro elétrico e o local do carregador. A comprimento de cabo mais curto é menos complexo e reduz os custos com materiais e mão de obra. O eletricista irá identificar um percurso que minimize os danos nas paredes e tetos já acabados.
Passagem de cabos por paredes, sótãos ou condutas
Para garantir uma instalação limpa e segura, um eletricista passa o cabo de secção grossa por espaços ocultos.
Em instalações interiores, o cabo pode frequentemente ser passado através de paredes, sótãos ou caves. No caso de percursos exteriores ou de montagem à superfície numa garagem, o cabo deve ser protegido dentro de um tubo condutor resistente. Isto protege a cablagem contra danos físicos e humidade, garantindo o cumprimento de todos os códigos elétricos locais.
Prever a instalação de cabos de dados, se necessário
Alguns carregadores inteligentes podem necessitar de uma ligação de dados por cabo (cabo Ethernet) para garantir uma comunicação fiável, caso o sinal Wi-Fi da casa seja fraco no local de carregamento. O proprietário deve discutir esta possibilidade com o instalador durante a fase de planeamento, para garantir que toda a cablagem necessária seja instalada em simultâneo.
Passo 4: Contrate um profissional para instalar o carregador de veículos elétricos
Embora alguns projetos domésticos sejam adequados para uma abordagem «faça você mesmo», um Instalação de carregadores de veículos eléctricos não é um deles. Os trabalhos elétricos de alta tensão exigem conhecimentos e competências especializadas. O proprietário deve contratar um profissional habilitado para garantir que o projeto seja concluído de forma segura e correta.
Por que deve recorrer a um eletricista certificado
Recorrer a um eletricista qualificado é um requisito imprescindível para este tipo de instalação. Isso protege o proprietário, a sua propriedade e o seu investimento.
Garantir a segurança e a conformidade com o código
Um eletricista certificado compreende os complexos requisitos do Código Elétrico Nacional (NEC). Ele assegura que a instalação utilize a secção de fio correta, o tipo adequado de disjuntor e dispositivos de segurança, como um GFCI. Este trabalho profissional garante que o sistema funcione em segurança e seja aprovado em quaisquer inspeções municipais exigidas, evitando falhas elétricas perigosas.
Os riscos de uma instalação feita por conta própria
Tentar instalar equipamento de carregamento de veículos elétricos sem a formação adequada é extremamente perigoso. Os riscos associados a uma instalação incorreta são graves e podem ter consequências catastróficas.
- Choque elétrico: O contacto direto com fios sob tensão pode causar ferimentos graves ou mesmo a morte.
- Riscos de incêndio: Uma instalação elétrica incorreta, ligações deficientes ou um circuito sobrecarregado podem provocar o sobreaquecimento dos componentes e causar um incêndio.
- Violações do código: A instalação de um carregador de veículos elétricos feita por conta própria não cumprirá os códigos de construção locais, o que poderá resultar em multas e na necessidade de uma remodelação completa por parte de um profissional.
Proteger a sua casa e a garantia do seu veículo elétrico
A maioria dos fabricantes de veículos elétricos e carregadores exige uma instalação profissional para que as garantias se mantenham válidas. Uma instalação incorreta pode danificar o sistema de carregamento do veículo ou o próprio carregador, e o fabricante não cobrirá as reparações.
Além disso, se ocorrer um incêndio de origem elétrica ou outros danos devido a uma instalação feita pelo próprio, a apólice de seguro residencial poderá recusar o pedido de indemnização. Uma instalação certificada fornece a documentação necessária para proteger essas garantias e apólices essenciais.
Como encontrar e avaliar um instalador
Encontrar o eletricista certo é um passo fundamental. O proprietário deve procurar profissionais com experiência específica nesta área.
Procurar instaladores certificados de veículos elétricos
Muitos fabricantes de carregadores mantêm uma rede de instaladores preferenciais ou certificados. Muitas vezes, o proprietário pode encontrar uma lista de eletricistas locais qualificados no site do fabricante. Estes profissionais receberam formação específica nos produtos dessa marca, garantindo uma instalação de alta qualidade.
Perguntas a fazer antes de contratar
Antes de contratar um eletricista, o proprietário deve fazer várias perguntas importantes:
- Tem experiência em projetos de instalação de carregadores para veículos elétricos?
- Tem licença e seguro para trabalhos eléctricos residenciais?
- Pode fornecer-me um orçamento detalhado e discriminado?
- Vão tratar do processo de licenciamento e inspeção?
- Qual é a garantia do vosso trabalho?
Verificação de licenças, seguros e referências
Um proprietário deve verificar sempre as credenciais de um eletricista. Pode solicitar uma cópia da licença estadual do eletricista e do certificado de seguro. Consultar avaliações online e pedir referências a clientes anteriores proporciona uma maior confiança na sua capacidade de realizar uma instalação segura e fiável.
Passo 5: O dia da instalação e a inspeção final
Com o planeamento concluído e um profissional contratado, o dia do Instalação de carregadores de veículos eléctricos marca a etapa final do processo. Saber o que esperar pode ajudar a garantir que o dia decorra sem problemas. O processo culmina com uma inspeção final para certificar que o trabalho é seguro e está em conformidade com todos os regulamentos.
O que esperar durante a instalação
A instalação profissional de um carregador de veículos elétricos é um processo sistemático. O eletricista segue um conjunto claro de etapas para garantir um resultado seguro e eficiente. Uma instalação padrão demora normalmente algumas horas do início ao fim.
Fluxo de trabalho do eletricista: No dia da instalação, o eletricista seguirá normalmente um plano estruturado:
- Revisão final do local: O eletricista chega e confirma o combinado local para o carregador e o planeado trajeto do cabo elétrico. Irão verificar se o carregador está colocado num local onde um carro não possa colidir acidentalmente com ele.
- Execução do traçado do cabo: Eles planeiam e executam a instalação do cabo desde o quadro elétrico até ao carregador. O eletricista irá discutir com o proprietário quaisquer trechos de cabo visíveis.
- Preparação da caixa de fusíveis: O técnico inspeciona o quadro elétrico para verificar se existe espaço disponível para o novo circuito. Se o quadro estiver cheio, será instalado um pequeno quadro secundário, tal como discutido anteriormente.
- Instalação física: Assim que todos os detalhes estiverem confirmados, o eletricista dá início ao trabalho prático de perfuração, montagem dos acessórios e fixação segura do cabo no local.
Instalação do novo circuito dedicado e do disjuntor
A primeira tarefa elétrica importante consiste em criar o novo circuito. Por razões de segurança, o eletricista desliga toda a alimentação da casa no disjuntor principal. Em seguida, instala um novo disjuntor bipolar nas duas ranhuras disponíveis no quadro elétrico. Este disjuntor está especificamente dimensionado para a amperagem do novo carregador dedicado para veículos elétricos.
Montagem segura da unidade de carregamento
Em seguida, o eletricista fixa a unidade de carregamento à parede de forma segura. Para tal, utilizará fixadores de alta resistência, de modo a garantir que o carregador fica estável e é capaz de suportar as repetidas ligações e desligações do pesado cabo de carregamento. A altura e a localização corresponderão ao plano, garantindo um acesso fácil a partir da porta de carregamento do veículo.
Instalação e fixação do cabo de alimentação
O eletricista instala o cabo de alimentação de secção grossa desde o quadro elétrico até ao local do carregador. Segue o percurso previamente planeado através de paredes, sótãos ou vãos sanitários. Em qualquer secção exposta, especialmente numa garagem ou ao ar livre, o cabo é protegido dentro de um tubo rígido. Isto protege a cablagem contra danos e humidade, um passo fundamental para uma instalação segura.
Ligações finais e testes do sistema
Com os componentes principais instalados, o eletricista efetua as ligações finais. Liga o cabo de alimentação à unidade de carregamento e verifica cuidadosamente todas as ligações no quadro elétrico. Após restabelecer a alimentação elétrica na habitação, realiza uma série de testes. Isto inclui verificar a tensão, confirmar se o carregador liga e testar as suas funcionalidades de comunicação para concluir a instalação.
Autorizações e inspecções
Uma instalação profissional inclui a gestão de toda a documentação necessária. As licenças e as inspeções não são obstáculos; são medidas de segurança que protegem o proprietário.
Quando é necessária uma licença de instalação elétrica
Na maioria das jurisdições, é necessária uma licença elétrica para instalar o hardware do carregador de veículo elétrico. O eletricista normalmente trata do processo de pedido da licença. Uma licença é quase sempre necessária porque o projeto envolve adicionar um novo circuito de alta potência à residência. Situações específicas que exigem licenças ou aprovações especiais incluem:
- Instalações em espaços partilhados, como uma garagem de estacionamento de condomínio.
- Trabalhos que exigem uma atualização do quadro de serviço ou um novo subquadro.
- Propriedades com um “serviço elétrico partilhado,”, que podem exigir aprovação da Empresa de Serviços Públicos.
- Instalações que não cumprem os critérios dos ‘códigos de construção padrão‘, como colocar um carregador num monumento histórico.
O Papel da Inspeção Elétrica Final
Após a conclusão do trabalho, um inspetor de construção local poderá precisar de realizar uma revisão final. Esta verificação por terceiros é o selo de aprovação definitivo do projeto. A função do inspetor é confirmar que o trabalho cumpre todos os códigos elétricos nacionais e locais. Durante a inspeção, serão verificados vários aspetos-chave da instalação:
- Todo o equipamento, incluindo o carregador, o disjuntor e a fiação, está classificado e dimensionado corretamente para a amperagem do circuito.
- O circuito possui a proteção adequada contra falhas de terra e curtos-circuitos.
- A unidade de carregamento está montada de forma segura à altura correta.
- Existe ventilação adequada para instalações interiores.
- Um dispositivo de desconexão está acessível para todos os componentes relevantes.
A aprovação nesta inspeção final proporciona ao proprietário tranquilidade, sabendo que a nova instalação do carregador de veículo elétrico foi realizada profissionalmente e, acima de tudo, é segura.
Quanto Custa Instalar um Carregador de Veículo Elétrico
Compreensão Quanto custa instalar um carregador de veículo elétrico é uma parte crítica do processo de planeamento para qualquer novo proprietário de um veículo elétrico. A despesa total é uma combinação de dois componentes principais: o preço do hardware em si e o custo da mão de obra profissional para a instalação. Estes valores podem variar significativamente com base no equipamento escolhido e na complexidade da instalação elétrica da casa.
Divisão dos Custos de Hardware
A primeira grande despesa é a compra da estação de carregamento Nível 2. O mercado oferece um amplo espectro de produtos com diferentes funcionalidades e capacidades, o que influencia diretamente o preço.
Gama de Preços para Carregadores Nível 2
Um proprietário pode esperar que o preço de um carregador residencial Nível 2 de qualidade varie aproximadamente de 400€ a mais de 1.200€. Carregadores básicos, não inteligentes, situam-se tipicamente na extremidade inferior desta gama. Modelos mais avançados e com mais funcionalidades de marcas premium têm um preço mais elevado.
Fatores que Influenciam o Preço do Carregador
Vários fatores-chave determinam o preço final custo da unidade de carregamento. Um comprador deve considerar estes elementos para selecionar um carregador que atenda às suas necessidades sem gastar demasiado.
- Potência de saída (amperagem): Carregadores de maior amperagem (ex.: 48A) que fornecem velocidades de carregamento . Ele precisa identificar o disjuntor específico que protege a tomada que pretende usar. A classificação de amperagem do disjuntor (ex.: 10A ou 20A) deve corresponder ao tipo de tomada. Em residências antigas, a fiação pode não ser suficiente para a carga sustentada de mais rápidas geralmente custam mais do que modelos de menor amperagem (ex.: 16A ou 32A).
- Caraterísticas inteligentes: Carregadores com conectividade Wi-Fi, controlos por aplicativo de smartphone e capacidades de monitorização de energia são mais caros do que carregadores básicos “simples”.
- Marca e Qualidade de Construção: Marcas estabelecidas, conhecidas pela fiabilidade e por designs robustos e à prova de intempéries, têm frequentemente um preço mais elevado.
- Comprimento do Cabo: Unidades com cabos de carregamento mais longos (25 pés vs. 18 pés) têm tipicamente um custo ligeiramente superior.
Repartição dos custos de instalação
A mão de obra para uma instalação profissional instalação é uma parte significativa da despesa total do projeto. O preço final depende fortemente das especificidades da propriedade e da infraestrutura elétrica existente.
O que Inclui uma “Instalação Padrão”
Uma “instalação padrão” ou “básica” instalação pressupõe uma configuração simples. O preço para este serviço varia geralmente entre 600€ e 1.500€. Embora cada projeto seja único, um pacote padrão cobre tipicamente o seguinte:
- Instalação de um novo circuito dedicado de 240V e do disjuntor apropriado no quadro elétrico.
- Montagem na parede da . Ele precisa identificar o disjuntor específico que protege a tomada que pretende usar. A classificação de amperagem do disjuntor (ex.: 10A ou 20A) deve corresponder ao tipo de tomada. Em residências antigas, a fiação pode não ser suficiente para a carga sustentada de unidade numa garagem ou numa parede exterior.
- Passagem de um comprimento limitado de cabo elétrico (ex.: menos de 40 pés) do quadro ao carregador.
- Ligação final, comissionamento e teste do carregador para garantir o funcionamento adequado.
Fatores Comuns que Aumentam os Custos de Mão de Obra
Muitas casas exigem mais do que uma instalação padrão, o que aumenta o custo da mão de obra custo. Um eletricista identificará estes fatores durante a avaliação inicial do local. Os proprietários devem estar cientes do que faz aumentar o preço ao avaliar quanto custa instalar um carregador de veículo elétrico.
Custos Adicionais Potenciais:
- Distância do Quadro: Quanto mais distante o carregador estiver do quadro elétrico, mais cabo e mão de obra são necessários. Passagens longas de cabo aumentam significativamente o custo do projeto.
- Abertura de valas: Para instalações exteriores longe da casa, um eletricista poderá precisar de abrir uma vala para enterrar o conduíte elétrico. Esta tarefa por si só pode adicionar 300€ a 500€ ou mais à fatura.
- Atualizações do Quadro Elétrico: Se o quadro estiver cheio ou não tiver capacidade, uma atualização ou subquadro é necessária. Isto pode adicionar várias centenas a mais de dois mil euros ao custo total.
- Licenças: As licenças elétricas municipais são frequentemente necessárias e podem custar entre 50€ e 200€.
Encontrar Reembolsos e Créditos Fiscais
Para ajudar a compensar a despesa, os proprietários podem aproveitar vários incentivos governamentais e de empresas de serviços públicos. Estes programas podem reduzir substancialmente o custo líquido. custo de compra e instalação de equipamento residencial. . Ele precisa identificar o disjuntor específico que protege a tomada que pretende usar. A classificação de amperagem do disjuntor (ex.: 10A ou 20A) deve corresponder ao tipo de tomada. Em residências antigas, a fiação pode não ser suficiente para a carga sustentada de equipamento.
Créditos fiscais federais para equipamentos de carregamento de veículos eléctricos
Nos Estados Unidos, proprietários de imóveis podem ser elegíveis para o Crédito Fiscal para Infraestrutura de Combustível Alternativo. Este incentivo federal pode cobrir uma porcentagem do custo total do projeto custo, incluindo tanto o hardware quanto as instalação taxas de instalação. Um proprietário deve consultar um profissional de contabilidade para confirmar sua elegibilidade e entender os benefícios específicos disponíveis para o ano fiscal vigente.
Reembolsos de Empresas de Serviços Públicos Estaduais e Locais
Além dos incentivos federais, muitos estados, governos locais e empresas de serviços públicos oferecem seus próprios reembolsos. Esses programas são projetados para incentivar a adoção de veículos elétricos, tornando o carregamento doméstico mais acessível. Um proprietário deve pesquisar os incentivos disponíveis em sua área específica. Esses reembolsos podem ser, às vezes, uma oferta direta de reembolso em dinheiro na compra de um carregador qualificado ou um crédito na conta de energia do proprietário.
Instalar um carregador doméstico para veículos elétricos é um passo fundamental para maximizar a conveniência e a relação custo-benefício de possuir um carro elétrico. Todo o processo de instalação do carregador requer um planejamento cuidadoso, desde avaliar o sistema elétrico para escolher o hardware adequado. Um proprietário deve sempre contar com um eletricista qualificado e licenciado para instalar o hardware do carregador com segurança.
Esta instalação profissional garante que o carregador doméstico seja confiável e esteja em conformidade com as normas. Uma instalação adequada protege o investimento em um carregador doméstico e proporciona total tranquilidade. 🛡️
FAQ
Um proprietário pode instalar ele próprio um carregador de veículos eléctricos?
Um proprietário nunca deve tentar uma instalação DIY (faça você mesmo). Este é um projeto de alta tensão que requer um eletricista licenciado. A instalação profissional garante segurança, conformidade com as normas e proteção das garantias da casa e do veículo. Fiação inadequada cria riscos significativos de incêndio e choque elétrico.
Quanto tempo demora uma instalação normal de um carregador para veículos eléctricos?
Uma instalação padrão é normalmente concluída em algumas horas. O eletricista instalará o novo circuito, montará a unidade e testará o sistema. Trabalhos mais complexos, como aqueles que exigem uma atualização do quadro de distribuição ou passagem de cabos longos, levarão mais tempo.
Todas as instalações de carregadores de veículos elétricos exigem uma licença?
A maioria das jurisdições exige uma licença elétrica para adicionar um novo circuito de 240V. O eletricista licenciado cuida desse processo. Uma licença garante que um inspetor independente verifique se o trabalho é seguro e atende a todos os códigos elétricos locais e nacionais.
Um carregador de veículo elétrico pode ser conectado a uma extensão?
Não. Um proprietário nunca deve usar uma extensão com um carregador de veículo elétrico Nível 2. Esses dispositivos consomem energia significativa de forma contínua. Uma extensão pode superaquecer e criar um sério risco de incêndio. O carregador requer seu próprio circuito dedicado e permanentemente instalado.
O que acontece se um quadro elétrico estiver cheio?
Um eletricista tem várias soluções se um quadro não tiver espaços livres. Às vezes, eles podem consolidar circuitos usando disjuntores tandem. Se essa não for uma opção, eles instalarão um pequeno subquadro para criar o espaço necessário para o novo circuito do carregador.
Qualquer carregador Nível 2 funcionará com qualquer carro elétrico?
Quase todos os veículos elétricos modernos e carregadores Nível 2 na América do Norte usam o mesmo conector J1772. Essa padronização garante interoperabilidade. Os veículos Tesla exigem um pequeno adaptador, que normalmente está incluído na compra do veículo, para usar um carregador não-Tesla.
Quanto um carregador doméstico aumentará a conta de energia?
O custo depende das tarifas locais de eletricidade e dos hábitos de condução. Carregar durante a noite, em horários fora de pico, reduz significativamente a despesa. Um carregador inteligente com recursos de agendamento ajuda o proprietário a carregar automaticamente quando a eletricidade é mais barata, otimizando o custo por milha. ⚡