

Electric vehicle ownership is rapidly expanding across the United States, with fully electric vehicles reaching a record 7.9% market share in Q3 2023. This growth makes a home EV-Ladegerät an increasingly valuable addition for new owners. To install EV charger hardware, you must first select a unit compatible with your vehicle and home’s electrical system. Many Hersteller von EV-Ladegeräten offer a variety of EV-Ladelösungen, ranging from powerful, wall-mounted units to simple tragbare EV-Ladegeräte. A licensed electrician must perform the installation of the EV-Ladegerät. This professional ensures the installation is safe and meets all electrical codes. The process typically involves assessing your home’s electrical panel capacity and running a new, dedicated circuit for the charging station.
First, Understand Your Home EV Charger Options
An EV owner needs to understand the available Lademöglichkeiten before selecting a unit. The choice directly impacts charging speed, installation complexity, and overall cost. The industry categorizes electric vehicle charging into three main levels. Each level offers different power outputs and use cases.
EV Charger Levels Explained
The primary difference between charging levels is the Leistungsabgabe, which determines how quickly an EV’s battery can be refilled.
Level 1 Aufladen (120V)
Level 1 charging uses a standard 120-volt household outlet, the same kind used for a phone or laptop. This method requires no special installation. The EV owner simply uses a portable cord set that comes with most electric vehicles. However, it is extremely slow. A Level 1 charger adds only about 3 to 7 miles of range per hour of charging. A full charge can take over 22 hours, making it impractical for drivers with long daily commutes. It serves best as a backup option or for plug-in hybrid vehicles with smaller batteries.
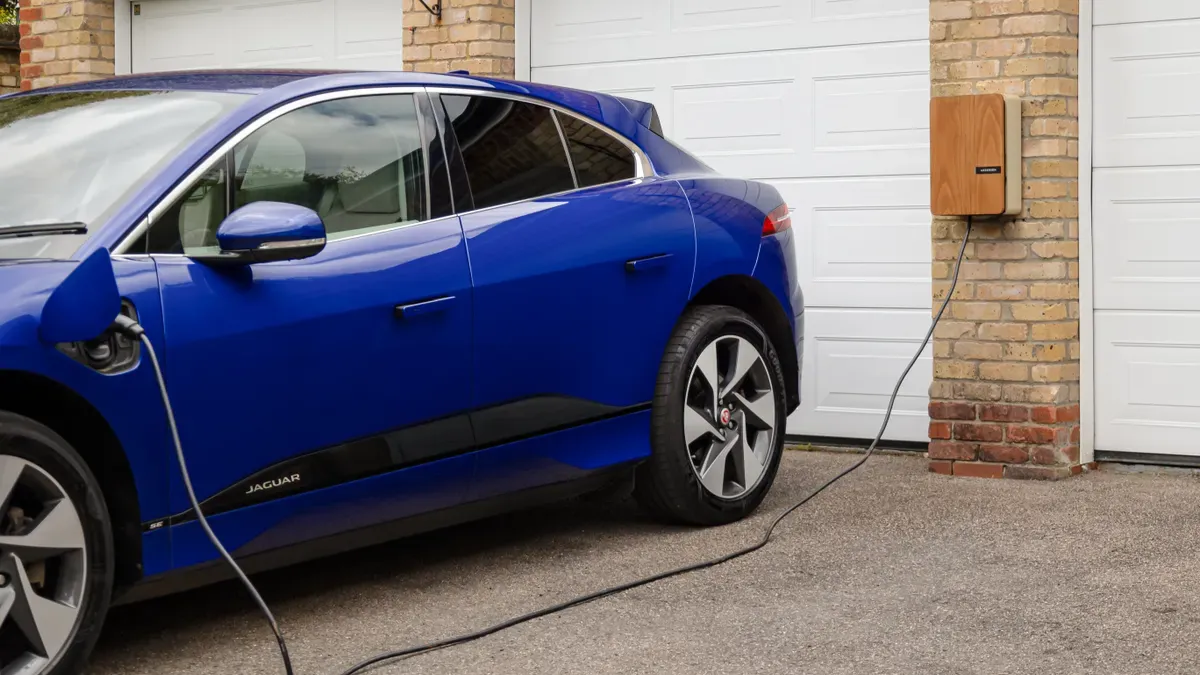
Level 2 Aufladung (240V)
Level 2 is the most common and practical solution for a home EV charger. These units use a 240-volt circuit, similar to an electric dryer or oven. This higher voltage allows for much faster charging speeds, typically adding 10 to 75 miles of range per hour. A full charge for a typical EV battery can be completed in just a few hours, usually overnight. This level requires professional installation of a dedicated circuit and the charging station itself.
DC-Schnellaufladung (Level 3)
DC Fast Charging, or Level 3, provides the quickest charging available. These powerful stations can charge an EV battery to 80% in under 20 minutes. They achieve this by converting AC power to DC power externally and delivering it directly to the battery, bypassing the car’s slower onboard converter. Due to their extremely high power output (30-400+ kW) and immense cost, DC Fast Chargers are not installed in homes. They are found exclusively at public charging stations along highways and in urban centers.
Why Level 2 is the Standard for Home Charging
For most EV owners, a Level 2 charger provides the ideal balance of speed, cost, and convenience for daily use.
Faster Charging Speeds
The most significant advantage of Level 2 charging is its speed. While a Level 1 charger might take over 22 hours to fill a 60kWh Batterie, a typical 7.4kW Level 2 charger can do the same job in about 8 hours. This ensures a full battery every morning, even after a long day of driving. The difference in performance is substantial.

Increased Convenience and Efficiency
A Level 2 charger transforms the EV ownership experience. It eliminates range anxiety for daily driving by providing a reliable and quick overnight charge. This convenience ensures the vehicle is always ready for the next day’s commute or errands. The efficiency of Level 2 charging means less time waiting and more time driving, making it the definitive standard for residential installations.
Schritt 1: Beurteilen Sie das elektrische System Ihres Hauses
An EV charger installation is a significant electrical project. Before purchasing any hardware, a homeowner must first assess their home’s electrical system. This crucial first step determines if the existing infrastructure can safely support the added load of a Level 2 charger. A thorough evaluation prevents potential hazards and costly surprises down the line.
Evaluate Your Electrical Panel (Breaker Box)
The electrical panel, or breaker box, is the heart of a home’s electrical system. It distributes power to all circuits. An electrician will inspect it to confirm its capacity and available space.
Checking Your Main Breaker Amperage
The main breaker is the largest switch in the panel, usually located at the top or bottom. This breaker shows the total amperage your home can draw from the grid. The number printed on it (e.g., 100A, 150A, 200A) indicates the panel’s total capacity. This value is a critical factor. It helps determine if the panel can handle the continuous load of an EV charger in addition to the home’s existing appliances.
Identifying Space for a New 240V Breaker
A Level 2 charger requires a dedicated 240-volt circuit. This circuit needs a new “double-pole” breaker, which takes up two adjacent physical slots in the panel. An electrician will check for two open, side-by-side slots. If the panel is full, they may be able to consolidate existing circuits using “tandem” breakers to free up space. In some cases, a small sub-panel might be a viable solution.
Determine Your Home’s Service Capacity
A home’s service capacity refers to the total amount of electricity supplied by the utility company. This capacity must be sufficient for both the home’s current needs and the new EV charger.
Understanding 100A vs. 200A Service
Most modern homes have a 200-amp service, which is generally sufficient for adding an EV charger. Many older or smaller homes, however, may only have 100-amp or even 60-amp service. A 100-amp service can often support an EV charger, but it depends heavily on the home’s other electrical loads, such as electric heating or a hot tub. An electrician must confirm the service can handle the increased demand safely.
When a Service Panel Upgrade is Necessary
A service panel upgrade becomes necessary if the existing panel lacks the capacity for the new charger. Signs that an upgrade is needed include a low-amperage main breaker (e.g., 60A or 100A in a home with high electrical usage) or a physically full panel with no room for a new 240V breaker. This is a more involved and costly project but ensures the home’s electrical system is safe and future-proof.
The Importance of a Professional Load Calculation
A professional load calculation is a non-negotiable step performed by a licensed electrician. It provides a detailed analysis of a home’s total electrical demand to ensure the system is not overloaded.
What is an Electrical Load Calculation?
An electrical load calculation is a systematic process defined by the National Electrical Code (NEC). An electrician inventories all major electrical loads in the home to determine the total power consumption. This includes fixed appliances and potential future loads. The calculation accounts for items such as:
- Refrigerator and oven
- HVAC system
- Water heater
- Dishwasher and microwave
- Lighting and general outlets
Sicherheit geht vor: This calculation is not a simple estimate. It is a formal procedure that ensures the new EV charger circuit will not exceed the safe capacity of the electrical panel or the home’s main service.
Why This Step is Critical for Safety
This calculation is critical for preventing dangerous overloads. Adding a high-power device like an EV charger without a proper assessment can trip breakers, damage appliances, or, in the worst case, cause an electrical fire. A professional load calculation guarantees that the installation complies with all safety codes. It protects the homeowner, their property, and their new electric vehicle.
Step 2: Choose the Right Home EV Charge Point

After confirming the home’s electrical system can support a new load, the next step is selecting the ideal home EV charging station. The market offers a wide array of options. A buyer must consider power output, physical design, and smart features to find the best fit for their vehicle and lifestyle.
Leistungsabgabe und Ladegeschwindigkeit
The power output of a charger, measured in amperes (A), directly determines how quickly it can replenish an EV’s battery.
Amperage Options (16A to 48A)
Level 2 chargers come in various amperage ratings, typically from 16A to 48A. A higher amperage delivers more power, resulting in faster charging. The speed is often measured in miles of range added per hour.
| Stromstärke | Miles of Range Added Per Hour (Approx.) |
|---|---|
| 16A | ~15 miles |
| 32A | ~30 miles |
| 48A | ~45 miles |
A 32A or 40A charger is a popular choice for most households. It provides a substantial speed increase over Level 1 charging without requiring a major electrical service upgrade in most cases.
Matching Charger to Your Car’s Onboard Charger
An EV has an onboard charger that converts AC power from the wall into DC power for the battery. This component has a maximum acceptance rate. A car with a 7.4 kW onboard charger cannot charge any faster, even if connected to an 11 kW (48A) station. An owner should select a home ev charger that matches or slightly exceeds their vehicle’s maximum AC charging rate to ensure optimal performance without overspending on unneeded power.
Physical Charger Types
Chargers also differ in their physical installation and cable configuration. These choices affect convenience, flexibility, and installation complexity.
Hardwired vs. Plug-In (NEMA 14-50)
A homeowner can choose between a hardwired unit or a plug-in model.
- Fest verdrahtet: An electrician wires the charger directly to the circuit. This permanent installation is often required for higher-amperage chargers (above 40A) and can be more reliable. It avoids potential issues with Fehlauslösungen, which can occur when a plug-in charger’s internal GFCI conflicts with a required GFCI breaker on the outlet.
- Plug-In: These chargers use a heavy-duty plug, like a NEMA 14-50. This offers flexibility, as the owner can unplug the unit and take it with them. It is an excellent option for renters or those who may move.
Tethered (Attached Cable) vs. Untethered (Socket)
This choice comes down to convenience versus aesthetics.
- Fest angebracht (Tethered): The charging cable is permanently attached to the unit. This is highly convenient; the driver simply parks and plugs in.
- Abnehmbar (Untethered): The unit has a socket, and the driver uses a separate cable (often the one stored in the car’s trunk) to connect. This provides a cleaner look when not in use.
Intelligente Funktionen und Konnektivität
Moderne Ladegeräte von Anbietern wie TPSON offer advanced features that enhance the charging experience and can save money.
Wi-Fi, App Control, and Scheduling
Smart chargers connect to a home’s Wi-Fi network. This allows the owner to monitor and control charging sessions via a smartphone app. A key benefit is scheduling. An owner can program the charger to begin charging during off-peak hours when electricity rates are lowest.
Utility Rate and Demand Response Integration
Some advanced chargers can integrate directly with utility company energy tariffs. The charger’s software automatically optimizes the charging schedule to use the cheapest electricity available. This ensures the car is ready by a set time while minimizing cost.
Connecting to Home Solar Systems
For homes with solar panels, certain smart chargers can prioritize using surplus solar energy. The system directs free, clean power from the sun into the EV’s battery. This maximizes self-consumption of solar energy and further reduces reliance on the grid.
Step 3: Plan the EV Charger Installation Location

Strategic planning of the charger’s location is essential for daily convenience and installation efficiency. A homeowner should work with their electrician to identify the optimal spot. This decision impacts both the cost of the project and the ease of future charging sessions.
Selecting the Best Spot for Your Charger
Finding the best place to E-Auto-Ladestation installieren involves balancing accessibility, safety, and the vehicle’s design.
Proximity to Your Parking Space
The charger should be installed as close as possible to where the EV is normally parked. This ensures the charging cable can reach the vehicle’s port comfortably without being stretched or creating a tripping hazard. Most standard charging cables are around 18 to 25 feet long. A well-placed unit makes the daily routine of plugging in effortless.
Considering Your Car’s Charging Port Location
Electric vehicles have charging ports in different locations—some are on the front, others on the side, and some at the rear. The homeowner must consider their specific vehicle’s port location when choosing a wall for the charger. This prevents the need to park in an awkward position or drape the cable over the vehicle.
Indoor (Garage) vs. Outdoor Installation
The choice between an indoor or outdoor installation depends on the property layout and owner preference.
- Indoor (Garage): A garage is often the best place to install an ev charger. It protects the unit from weather, potential vandalism, and extreme temperatures, which can extend its lifespan. Proper ventilation is still important to dissipate any heat generated during charging.
- Outdoor: If a garage is not available, an outdoor installation is a perfectly viable option. In this case, the owner must select a charger with a high Ingress Protection (IP) rating, such as IP65. This rating ensures the unit is sealed against dust and rain. The charger and its wiring must also be UV-resistant to prevent sun damage.
Planung der Verkabelungsstrecke
An electrician will map out the most efficient path for the electrical cable, which is a critical part of the installation plan.
Path from Breaker Panel to Charger
The ideal wiring route is the shortest and most direct path from the electrical panel to the charger location. A shorter cable run is less complex and reduces material and labor costs. The electrician will identify a route that minimizes disruption to finished walls and ceilings.
Running Cable Through Walls, Attics, or Conduit
To achieve a clean and safe installation, an electrician runs the heavy-gauge cable through concealed spaces.
For indoor installations, the cable can often be routed through walls, attics, or basements. For outdoor runs or surface mounting in a garage, the cable must be protected inside a durable conduit. This protects the wiring from physical damage and moisture, ensuring compliance with all local electrical codes.
Planning for Data Cable if Needed
Some smart chargers may require a hardwired data connection (Ethernet cable) for reliable communication if the home’s Wi-Fi signal is weak at the charging location. A homeowner should discuss this possibility with the installer during the planning phase to ensure all necessary wiring is run at the same time.
Step 4: Hire a Professional to Install EV Charger
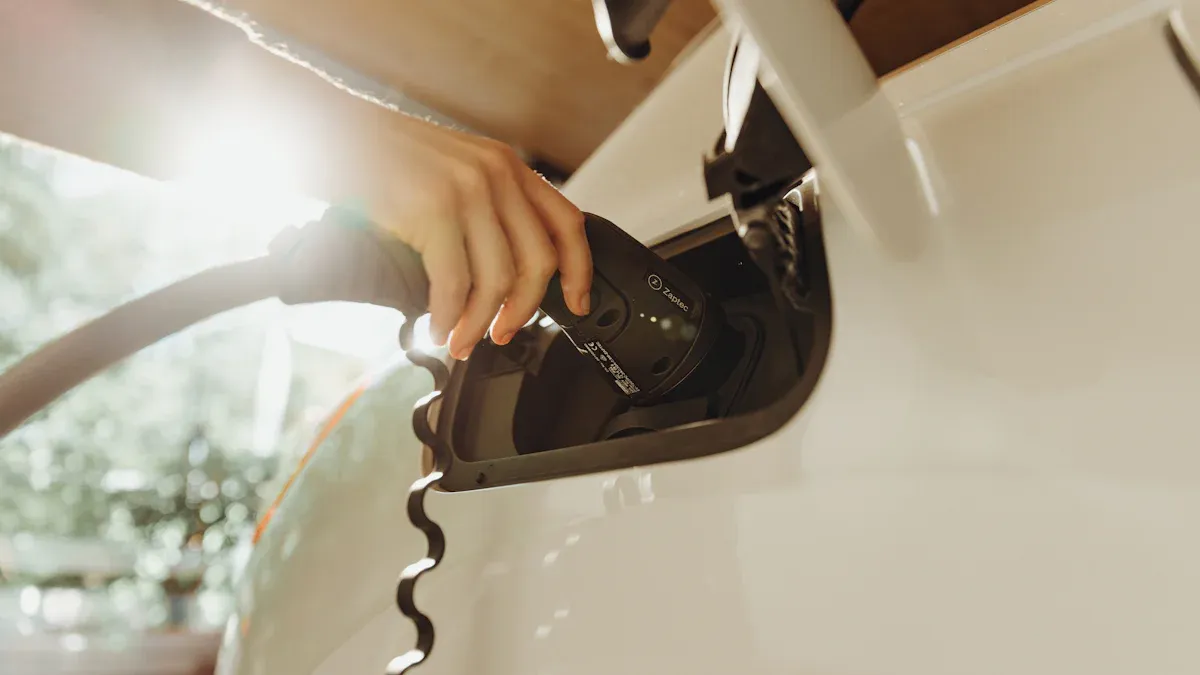
While some home projects are suitable for a DIY approach, an Installation von EV-Ladegeräten is not one of them. The high-voltage electrical work requires specialized knowledge and skills. A homeowner must hire a licensed professional to ensure the project is completed safely and correctly.
Why You Must Use a Licensed Electrician
Using a qualified electrician is a non-negotiable requirement for this type of installation. It protects the homeowner, their property, and their investment.
Gewährleistung von Sicherheit und Einhaltung von Vorschriften
A licensed electrician understands the complex requirements of the National Electrical Code (NEC). They ensure the installation uses the correct wire gauge, breaker type, and safety devices like a GFCI. This professional work guarantees the system operates safely and passes any required municipal inspections, preventing dangerous electrical faults.
The Dangers of a DIY Installation
Attempting to install ev charger hardware without proper training is extremely hazardous. The risks associated with improper work are severe and can have catastrophic consequences.
- Electrical Shock: Direct contact with live wires can cause serious injury or even death.
- Fire Hazards: Incorrect wiring, poor connections, or an overloaded circuit can cause components to overheat and start a fire.
- Verstöße gegen den Kodex: A DIY ev charger installation will not meet local building codes, leading to fines and the need for a complete rework by a professional.
Protecting Your Home and EV Warranty
Most EV and charger manufacturers require professional installation to keep their warranties valid. An improper installation can damage the vehicle’s charging system or the charger itself, and the manufacturer will not cover the repairs.
Furthermore, if an electrical fire or other damage occurs due to a DIY installation, a homeowner’s insurance policy may deny the claim. A certified installation provides the necessary documentation to protect these crucial warranties and policies.
How to Find and Vet an Installer
Finding the right electrician is a critical step. A homeowner should look for professionals with specific experience in this field.
Searching for Certified EV Installers
Many charger manufacturers maintain a network of preferred or certified installers. A homeowner can often find a list of qualified local electricians on the manufacturer’s website. These professionals have received specific training on that brand’s products, ensuring a high-quality installation.
Vor der Einstellung zu stellende Fragen
Before committing to an electrician, a homeowner should ask several key questions:
- Do you have experience with ev charger installation projects?
- Sind Sie für Elektroarbeiten in Wohngebieten zugelassen und versichert?
- Can you provide a detailed, itemized quote?
- Will you handle the permitting and inspection process?
- What is the warranty on your workmanship?
Verifying Licenses, Insurance, and References
A homeowner should always verify an electrician’s credentials. They can ask for a copy of the electrician’s state license and certificate of insurance. Checking online reviews and asking for references from previous clients provides additional confidence in their ability to perform a safe and reliable installation.
Step 5: The Installation Day and Final Inspection
With the planning complete and a professional hired, the day of the Installation von EV-Ladegeräten marks the final step in the process. Knowing what to expect can make the day go smoothly. The process culminates with a final inspection to certify the work is safe and compliant with all regulations.
Was Sie bei der Installation zu erwarten haben
A professional ev charger installation is a systematic process. The electrician follows a clear set of steps to ensure a safe and efficient outcome. A standard installation typically takes a few hours from start to finish.
Electrician’s Workflow: On the day of the installation, the electrician will typically follow a structured plan:
- Final Site Review: The electrician arrives and confirms the agreed-upon location for the charger and the planned route for the electrical cable. They will verify the charger is placed where a car cannot accidentally hit it.
- Cable Route Execution: They plan and execute the “cable run” from the breaker box to the charger. The electrician will discuss any sections of visible cable with the homeowner.
- Fuse Box Preparation: The professional inspects the breaker box to confirm the spare slot for the new circuit. If the panel is full, they will install a small sub-panel as previously discussed.
- Physische Installation: Once all details are confirmed, the electrician begins the physical work of drilling, mounting the hardware, and clipping the cable securely in place.
Installing the New Dedicated Circuit and Breaker
The first major electrical task is creating the new circuit. For safety, the electrician shuts off all power to the home at the main breaker. They then install a new double-pole breaker into the two available slots in the electrical panel. This breaker is specifically rated for the amperage of the new dedicated EV charger.
Mounting the Charging Unit Securely
Next, the electrician securely mounts the charging unit to the wall. They will use heavy-duty fasteners to ensure the charger is stable and can withstand the repeated plugging and unplugging of the heavy charging cable. The height and location will match the plan, ensuring easy access from the vehicle’s charge port.
Running and Securing the Power Cable
The electrician runs the heavy-gauge power cable from the breaker panel to the charger’s location. They follow the pre-planned route through walls, attics, or crawlspaces. For any exposed sections, especially in a garage or outdoors, the cable is protected inside a rigid conduit. This protects the wiring from damage and moisture, a critical step for a safe installation.
Final Connections and System Testing
With the main components in place, the electrician makes the final connections. They wire the power cable to the charging unit and double-check all connections in the panel. After restoring power to the home, they perform a series of tests. This includes checking the voltage, confirming the charger powers on, and testing its communication features to complete the installation.
Genehmigungen und Inspektionen
A professional installation includes handling all necessary paperwork. Permits and inspections are not obstacles; they are safeguards that protect the homeowner.
When an Electrical Permit is Required
Most jurisdictions require an electrical permit to install ev charger hardware. The electrician typically handles the permit application process. A permit is almost always necessary because the project involves adding a new, high-power circuit to the home. Specific situations that mandate permits or special approvals include:
- Installations in a shared space, like a condominium parking garage.
- Work that requires a service panel upgrade or a new sub-panel.
- Properties with a “shared electrical service,” which may require approval from the Utility Company.
- Installations that do not meet ‘standard building codes‘ criteria, such as placing a charger on a historic landmark.
The Role of the Final Electrical Inspection
After the work is complete, a local building inspector may need to conduct a final review. This third-party verification is the ultimate seal of approval for the project. The inspector’s job is to confirm the work complies with all National and local electrical codes. During the inspection, they will verify several key aspects of the installation:
- All equipment, including the charger, breaker, and wiring, is correctly rated and sized for the circuit’s amperage.
- The circuit has the proper ground-fault and short-circuit protection.
- The charging unit is mounted securely at the correct height.
- Proper ventilation is present for indoor installations.
- A disconnect is accessible for all relevant components.
Passing this final inspection provides the homeowner with peace of mind, knowing their new ev charger installation is professionally done and, most importantly, safe.
How Much It Costs to Install an EV Charger
Verstehen how much it costs to install an EV charger is a critical part of the planning process for any new EV owner. The total expense is a combination of two main components: the price of the hardware itself and the cost of professional labor for the Installation. These figures can vary significantly based on the equipment chosen and the complexity of the home’s electrical setup.
Breakdown of Hardware Costs
The first major expense is the purchase of the Level 2 charging station. The market offers a wide spectrum of products with different features and capabilities, which directly influences the price.
Die erste große Ausgabe ist die Ladehardware. Der Markt bietet eine Vielzahl von Optionen mit Preisen, die deren Funktionen und Fähigkeiten widerspiegeln.
A homeowner can expect the price for a quality Level 2 residential charger to range from approximately $400 to over $1,200. Basic, non-smart chargers typically fall at the lower end of this spectrum. More advanced, feature-rich models from premium brands command a higher price.
Factors Influencing Charger Price
Several key factors determine the final Kosten of the charging unit. A buyer should consider these elements to select a charger that meets their needs without overspending.
- Leistungsabgabe (Stromstärke): Higher-amperage chargers (e.g., 48A) that deliver faster das Laden speeds generally cost more than lower-amperage models (e.g., 16A or 32A).
- Intelligente Funktionen: Chargers with Wi-Fi connectivity, smartphone app controls, and energy monitoring capabilities are more expensive than basic “dumb” chargers.
- Brand and Build Quality: Established brands known for reliability and robust, weatherproof designs often have a higher price point.
- Cable Length: Units with longer charging cables (25 feet vs. 18 feet) typically carry a slightly higher cost.
Aufschlüsselung der Installationskosten
The labor for a professional Installation is a significant portion of the total project expense. The final price depends heavily on the specifics of the property and the existing electrical infrastructure.
What a “Standard Installation” Includes
A “standard” or “basic” Installation assumes a straightforward setup. The price for this service generally ranges from $600 to $1,500. While every project is unique, a standard package typically covers the following:
- Installation of a new dedicated 240V circuit and appropriate breaker in the electrical panel.
- Wall-mounting the das Laden unit in a garage or on an exterior wall.
- Running a limited length of electrical cable (e.g., under 40 feet) from the panel to the charger.
- Final connection, commissioning, and testing of the charger to ensure proper operation.
Common Factors That Increase Labor Costs
Many homes require more than a standard installation, which increases the labor Kosten. An electrician will identify these factors during the initial site assessment. Homeowners should be aware of what drives up the price when evaluating how much it costs to install an ev charger.
Potential Added Costs:
- Distance from Panel: The farther the charger is from the electrical panel, the more cable and labor are required. Long cable runs significantly increase the project cost.
- Grabenaushub: For outdoor installations far from the house, an electrician may need to dig a trench to bury the electrical conduit. This task alone can add $300 to $500 or more to the bill.
- Electrical Panel Upgrades: If the panel is full or lacks capacity, an upgrade or sub-panel is necessary. This can add several hundred to over two thousand dollars to the total cost.
- Genehmigungen: Municipal electrical permits are often required and can cost between $50 and $200.
Finding Rebates and Tax Credits
To help offset the expense, homeowners can take advantage of various government and utility incentives. These programs can substantially reduce the net Kosten of purchasing and installing home das Laden equipment.
Federal Tax Credits for EV Charging Equipment
In the United States, homeowners may be eligible for the Steuergutschrift für die Infrastruktur für alternative Kraftstoffe. This federal incentive can cover a percentage of the total project Kosten, including both the hardware and the Installation fees. A homeowner should consult with a tax professional to confirm their eligibility and understand the specific benefits available for the current tax year.
Rabatte von Versorgungsunternehmen auf Bundesstaaten- und lokaler Ebene
Neben bundesstaatlichen Anreizen bieten viele Bundesstaaten, Kommunen und Versorgungsunternehmen eigene Rabatte an. Diese Programme sollen die Einführung von Elektrofahrzeugen fördern, indem sie das Laden zu Hause erschwinglicher machen. Hausbesitzer sollten die in ihrer jeweiligen Region verfügbaren Anreize recherchieren. Bei diesen Rabatten handelt es sich manchmal um ein direktes Cashback-Angebot beim Kauf eines förderfähigen Ladegeräts oder um eine Gutschrift auf der Stromrechnung des Hausbesitzers.
Die Installation einer Heim-Ladestation für Elektrofahrzeuge ist ein entscheidender Schritt, um den Komfort und die Kosteneffizienz eines Elektroautos zu maximieren. Der gesamte Installationsprozess einer EV-Ladestation erfordert eine sorgfältige Planung, angefangen bei der Bewertung des elektrischen Systems zu Auswahl der passenden Hardware. Ein Hausbesitzer sollte stets einen qualifizierten, lizenzierten Elektriker mit der sicheren Installation der EV-Ladegeräte-Hardware beauftragen.
Diese professionelle Installation stellt sicher, dass die Heim-Ladestation zuverlässig und normgerecht. ist. Eine fachgerechte Installation schützt die Investition in eine Heim-Ladestation und bietet ultimative Sicherheit. 🛡️
FAQ
Kann ein Hausbesitzer ein E-Ladegerät selbst installieren?
Ein Hausbesitzer sollte niemals versuchen, die Installation selbst durchzuführen. Es handelt sich um ein Hochspannungsprojekt, das einen lizenzierten Elektriker erfordert. Die professionelle Installation gewährleistet Sicherheit, Normkonformität und den Schutz der Garantien für Haus und Fahrzeug. Unsachgemäße Verkabelung birgt erhebliche Brand- und Stromschlagrisiken.
Wie lange dauert die Installation eines Standard-EV-Ladegeräts?
Eine Standardinstallation ist in der Regel innerhalb weniger Stunden abgeschlossen. Der Elektriker wird den neuen Stromkreis installieren, die Einheit montieren und das System testen. Komplexere Arbeiten, wie solche, die ein Upgrade des Verteilerkastens oder lange Kabelwege erfordern, dauern länger.
Benötigt jede EV-Ladestationsinstallation eine Genehmigung?
In den meisten Gerichtsbarkeiten ist für die Installation eines neuen 240-V-Stromkreises eine elektrische Genehmigung erforderlich. Der lizenzierte Elektriker übernimmt diesen Prozess. Eine Genehmigung stellt sicher, dass ein unabhängiger Prüfer die Arbeit auf Sicherheit und Konformität mit allen lokalen und nationalen Elektrovorschriften überprüft.
Kann eine EV-Ladestation an eine Verlängerungsschnur angeschlossen werden?
Nein. Ein Hausbesitzer darf niemals eine Verlängerungsschnur mit einer Level-2-EV-Ladestation verwenden. Diese Geräte ziehen kontinuierlich erhebliche Leistung. Eine Verlängerungsschnur kann überhitzen und ein ernsthaftes Brandrisiko darstellen. Das Ladegerät benötigt einen eigenen, fest installierten, dedizierten Stromkreis.
Was passiert, wenn ein Elektroverteilerkasten voll ist?
Ein Elektriker hat mehrere Lösungen, wenn ein Verteilerkasten keine freien Plätze mehr hat. Manchmal können Stromkreise mit Tandem-Leistungsschaltern konsolidiert werden. Wenn das nicht möglich ist, wird ein kleiner Unterverteiler installiert, um den benötigten Platz für den neuen Ladegerät-Stromkreis zu schaffen.
Funktioniert jedes Level-2-Ladegerät mit jedem Elektroauto?
Fast alle modernen Elektrofahrzeuge und Level-2-Ladegeräte in Nordamerika verwenden denselben J1772-Anschluss. Diese Standardisierung gewährleistet Interoperabilität. Tesla-Fahrzeuge benötigen einen kleinen Adapter, der in der Regel beim Fahrzeugkauf enthalten ist, um ein Nicht-Tesla-Ladegerät zu nutzen.
Wie stark erhöht eine Heimladestation die Stromrechnung?
Die Kosten hängen von den lokalen Stromtarifen und den Fahrgewohnheiten ab. Das Laden während der Nachtstunden zu Schwachlastzeiten senkt die Kosten erheblich. Ein intelligentes Ladegerät mit Zeitplanungsfunktionen hilft dem Hausbesitzer, automatisch dann zu laden, wenn der Strom am günstigsten ist, und optimiert so die Kosten pro Meile. ⚡