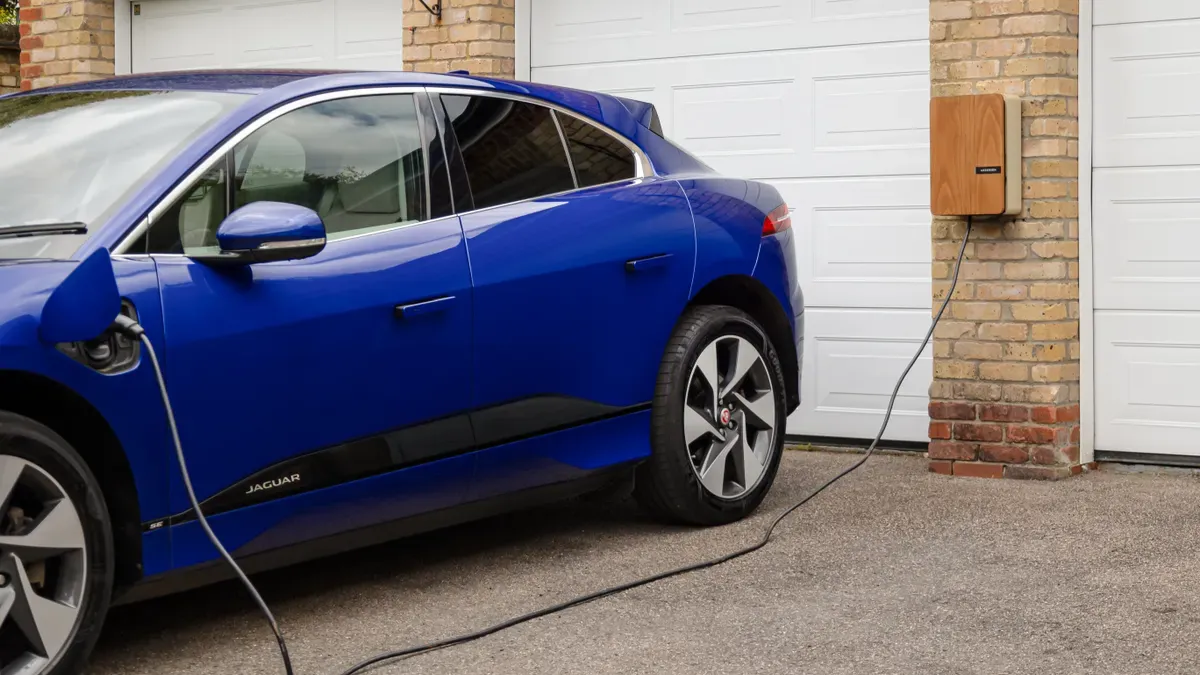
Bir EV şarj cihazı için garajdaki en iyi konum, kablo erişimini ve takılma riskini en aza indiren, konnektörü darbelerden ve nemden koruyan, kurulum maliyetini kontrol altında tutacak kadar kısa bir kablo güzergahı sağlayan — ve aynı zamanda şarj cihazının güvenli bir sürekli yükte çalışmasına izin veren noktadır. Çoğu evde bu, ünitenin aracın şarj portuna en yakın yan duvara, günlük kullanım için pratik bir yükseklikte, kablo düzeni için açık bir yol bırakılarak ve kapılardan, hareketli aletlerden ve depolama alanlarından yeterli mesafede monte edilmesi anlamına gelir.
Bu planlama rehberi, güvenlik, kullanılabilirlik ve uzun vadeli güvenilirliği etkileyen yerleşim kararlarına odaklanmaktadır. Car and Driver tarafından açıklanan saha testli hususları (dış mekan derecelendirmeleri, devre boyutlandırması, sürekli yük limitleri ve yük yönetiminin rolü), artı Smart Charge America'dan pazar örneklerini (yaygın ev tipi şarj cihazı konfigürasyonları) ve TPSON'un ürün ekosistemini (akıllı güvenlik izleme ve EV şarj ürün gamı boyunca konumlandırılmış Dinamik Yük Dengeleme dahil) içermektedir.
- Kısa cevap: çoğu garaj için “en iyi nokta”
- Donanımdan değil, yerleşimden başlayın: haritalandırılması gerekenler
- Şarj portu tarafına ve park etme alışkanlığına göre seçim yapın
- Montaj yüksekliği, boşluklar ve kablo düzeni
- Kablo güzergahı planlaması (neden genellikle daha kısa hatlar kazanır)
- İç mekan vs. dış mekan sınırları (driveway şarjı ve hava koşulları)
- Garajda güç planlaması: sürekli yük ve gerçekçi amper değerleri
- Dinamik Yük Dengelemenin konumu nasıl etkilediği
- İki-EV'li garajlar: yeniden çalışmayı önleyen yerleşim seçenekleri
- Yaygın yerleştirme hataları (ve bunlardan nasıl kaçınılacağı)
- Yazdırılabilir planlama şablonu (ölçümler + kontrol listesi)
- SSS
- Referanslar ve harici kaynaklar
Kısa cevap: çoğu garaj için “en iyi nokta”
Tipik tek araçlı bir garaj için, en tutarlı şekilde başarılı olan yerleşim: aracın şarj portuna en yakın yan duvar, kablonun ana yürüme yolunu kesmeden porta ulaşabileceği bir noktaya monte edilmiş şekilde.
| Garaj tipi | En iyi varsayılan şarj cihazı konumu | Neden işe yarar | Doğrulanacak noktalar |
|---|---|---|---|
| Tek araçlı, aracın önü içeri park edildiğinde | Port tarafındaki yan duvarın ön üçte birlik kısmı | En kısa erişim; kablonun bölmeyi kesmesini önler | Kapı açılma mesafesi, raflar ve yürüme yolu boşluğu |
| Tek araçlı, araç bazen dışarıda park edildiğinde | Garaj kapısı yan sövesine yakın yan duvar (port tarafı) | İç mekan ve driveway şarjı için uygundur | Kapı altında kablo sıkışma riski; hava koşullarına maruz kalma |
| İki araçlı garaj (bugün bir EV, ileride iki EV) | Ortak duvarda bölmeler arasında veya merkezi bir kolon üzerinde | Her iki park yeri için daha iyi erişim esnekliği | Kablo düzeni; ileride ikinci bir devre veya paylaşım |
Ürün kategorisi seçimi için (AC duvar tipi şarj cihazları vs. özel amaçlı DC), TPSON seçenekleri şu başlık altında düzenler: Elektrikli Araç Şarj Cihazları, garaj tipi duvar tipi şarj cihazı aileleri ise şu başlık altında listelenir: AC EV Şarj Cihazları.
Donanımdan değil, yerleşimden başlayın: haritalandırılması gerekenler
Yüksek performanslı garaj kurulumları basit bir haritalandırma çalışmasıyla başlar. En önemli girdiler elektriksel değil, fizikseldir: park pozisyonu, şarj portu konumu, ve yürüme yolları.
Alınması gereken minimum ölçümler (10 dakika)
- Planlanan duvardan aracın şarj portuna olan mesafe (hem düz park halinde hem de hafif yan park halinde).
- Dikme/beton konumu ve elektrik panosuna geri dönüş için en uygun iletim kanalı güzergahı.
- Kapı hareket bölgeleri: garaj kapısı rayları, yan kapılar ve araç kapısı açılma alanı.
- Şarj cihazı tutamacına erişimi engelleyebilecek depolama alanları (bisikletler, kutular, merdivenler).
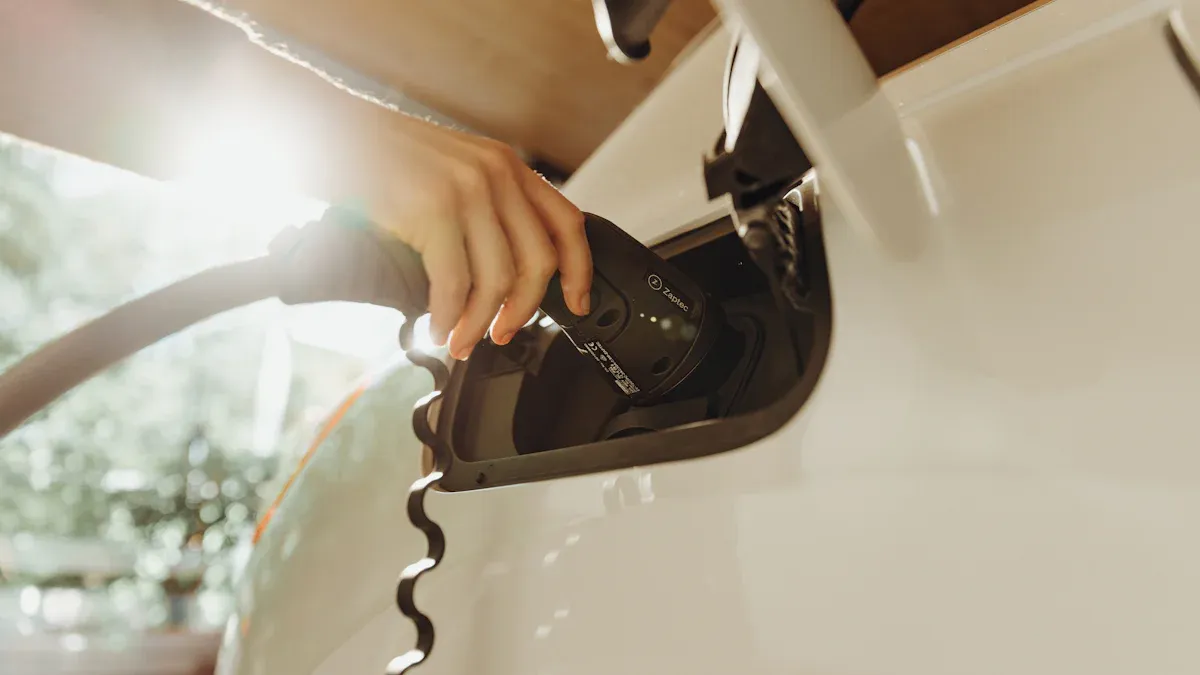
Bir sürücü, kabloya basmadan, kabloyu germeden ve konnektörü yere değdirmeden tek eliyle takabiliyorsa, bir yerleşim “doğru”dur. Bu, günlük kullanılabilirlik.
Şarj portu tarafına ve park etme alışkanlığına göre seçim yapın
için pratik ölçüttür.
tekrarlayan kablo sürtünmesi, daha fazla zemin teması ve tutamak ve kabloda daha yüksek uzun vadeli aşınmaya neden olur.
| Üç yaygın desen | Port konumu | En iyi duvar seçimi | Kablo güzergahı hedefi |
|---|---|---|---|
| Kaçınılacak durumlar | Ön-sol / ön-sağ | Port tarafındaki duvarın ön üçte birlik kısmı | Çamurluk bölgesine kısa, direkt erişim |
| Kablonun bölme merkez hattını kesmesi | Arka-sol / arka-sağ | Port tarafındaki duvarın arka üçte birlik kısmı | Kablonun arka tampon bölgesi yakınında kalması |
| Kablonun araç kapıları ve ayaklar altında kalması | Ön-orta (bazı platformlar) | Merkez hattına veya kolona yakın ön duvar | Mounting where car bumper can strike the unit |
Montaj yüksekliği, boşluklar ve kablo düzeni
A charger that is “technically installed” can still be a daily frustration if the handle is too low (dragging), too high (awkward reach), or blocked by storage. The goal is consistent access and a predictable loop for cord storage.
Placement rules that reduce damage and tripping
- Keep the holster off the floor; floor contact increases dirt ingress and connector wear.
- Keep the cable out of the main walking lane; prefer routing along the wall then to the port.
- Reserve space for a dedicated hook or integrated cable management; Smart Charge America product listings show that many mainstream home chargers include cable management, but layout still determines whether it is used properly.
- Protect against impact: avoid mounting in a spot where the bumper, doors, or rolling tool chests can strike the unit.
Why this matters for long-term reliability
Car and Driver’s testing notes that cord length and thickness differences did not produce measurable charging-performance differences, but daily usability (cable handling and storage) strongly influences owner satisfaction. In practice, a well-managed cable also reduces accidental strain at the connector and mounting bracket.
Kablo güzergahı planlaması (neden genellikle daha kısa hatlar kazanır)
Garage charger placement affects the electrical scope. A location that requires a long conduit run, a complex attic drop, or trenching typically increases labor and may increase conductor size. Car and Driver notes that installation cost depends heavily on available electrical capacity and the complexity of running a dedicated line; it can range from a few hundred dollars to several thousand when upgrades are required.
A practical planning hierarchy
- First priority: safe daily use (short reach, low trip risk).
- Second priority: an efficient wiring path (shorter run, simpler routing).
- Third priority: future flexibility (second EV, driveway charging, or a different connector standard).
Typical quotes and plans reference conduit routing, breaker panel capacity, sürekli bir yüktür, wire gauge, voltage drop, ve GFCI/RCD coordination. The optimal location is the one that reduces scope without compromising safety.
İç mekan vs. dış mekan sınırları (driveway şarjı ve hava koşulları)
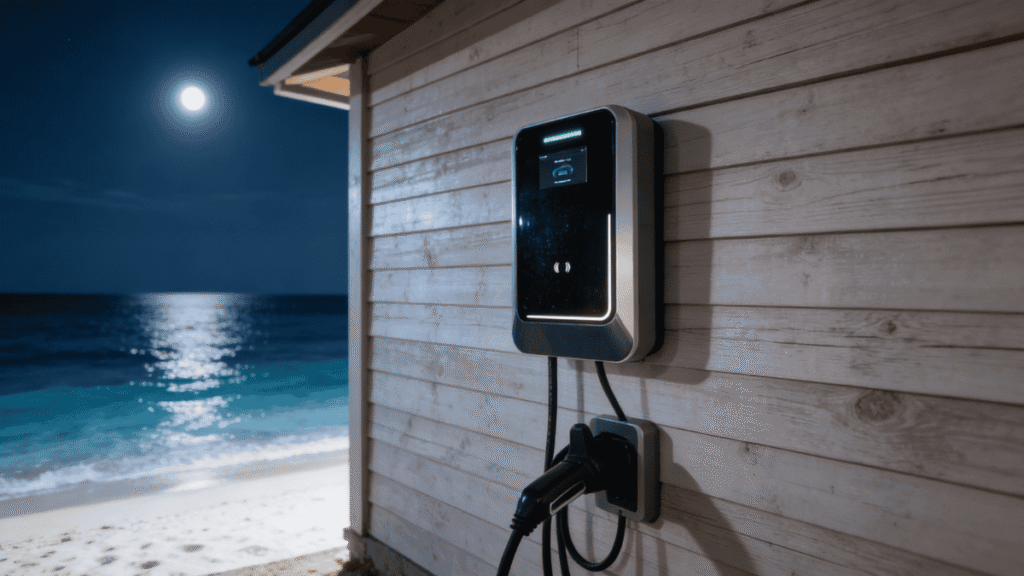
Some households frequently charge in the driveway due to garage storage or parking patterns. Car and Driver notes that outdoor mounting is generally feasible if the charger and the electrical feed are appropriately rated (NEMA or IP) and the outlet enclosure is outdoor-rated when using plug-in equipment.
Two robust strategies
| Strateji | When it fits | Key advantage | Key trade-off |
|---|---|---|---|
| Indoor mount near garage door jamb | Occasional driveway charging | Protected unit; short route outside | Cable can interact with door seal path |
| Outdoor-rated mount on exterior wall | Frequent driveway charging | Most convenient for outside parking | Exposure planning; outdoor-rated wiring/enclosure required |
Garajda güç planlaması: sürekli yük ve gerçekçi amper değerleri
Location decisions should align with the power plan. Car and Driver recommends a modest 40- or 50-amp circuit as a strong middle ground for overnight charging, and explains that EV charging hardware typically runs at 80% of circuit capability for continuous load (for example, 50A circuit → 40A continuous). This affects both circuit design and the practical benefit of placing the charger farther away.
Charging tiers commonly seen in home products
Retail listings confirm that most home units cluster around 40–48A output. Smart Charge America lists Emporia as 40A plug-in or 48A hardwired. Car and Driver’s 2026 testing also highlights mainstream options in the 6–48A capability range, reinforcing that the garage layout should be designed around realistic overnight charging rather than extreme amperage.
| Common continuous output | Typical circuit pairing (illustrative) | Practical garage implication |
|---|---|---|
| 32A (~7.7 kW @ 240V) | 40A breaker | Easier routing; often sufficient for overnight replenishment |
| 40A (~9.6 kW @ 240V) | 50A breaker | Most common “balanced” home configuration |
| 48A (~11.5 kW @ 240V) | 60A breaker | Hardwire favored; placement should reduce cable strain and heat exposure |
Dinamik Yük Dengelemenin konumu nasıl etkilediği
Dinamik Yük Dengeleme changes garage planning when a home has limited electrical headroom or multiple high-demand appliances. Car and Driver describes load management as a way to prevent panel upgrades by automatically reducing charging draw when necessary. Smart Charge America similarly describes Emporia Pro’s dynamic adjustment based on home energy monitoring.
TPSON positions Dynamic Load Balancing as an integrated protection approach across its EV charging ecosystem, designed to protect the home’s electrical system while maintaining stable charging. TPSON’s home page also highlights Gelişmiş Güvenlik Koruması, Dinamik Sıcaklık Kontrolü, ve Gerçek Zamanlı Teşhis ve Uyarılar, which are directly relevant to high-usage garage installations.
Placement implications when DLB is part of the plan
- If an energy meter/monitor or network gateway is required, confirm the communication path (Wi?Fi/Ethernet/4G) in the garage location.
- Prefer a mounting point with stable signal and easy access for service checks.
- If the panel is remote, choose a charger location that avoids overly complex cable routing; DLB helps reduce upgrade needs, but it does not eliminate installation complexity.
İki-EV'li garajlar: yeniden çalışmayı önleyen yerleşim seçenekleri
Two-EV households frequently outgrow a “single-car” placement plan. The goal is to choose a location that allows flexibility for both stalls without forcing a second full rewire later. Car and Driver highlights solutions such as power sharing for multi-EV households, and market offerings commonly support scheduling and load-oriented controls.
Three scalable layouts
| Layout | Best for | Strength | Watch-outs |
|---|---|---|---|
| Central mount (between bays) | Two cars, mixed port locations | Maximum reach flexibility | Cable routing must avoid both walking lanes |
| Two dedicated mounts (each bay) | High daily mileage, frequent simultaneous charging | Simplest daily use | Higher electrical scope; needs capacity planning |
| One mount + managed scheduling/load balancing | Moderate needs, long overnight window | Reduces upgrade pressure | Requires good user discipline and configuration |
For broader infrastructure planning, TPSON positions solutions for homeowners and fleets under its Elektrikli Araç Şarj Cihazları ecosystem. For specific garage wallbox options, see AC EV Şarj Cihazları.
Yaygın yerleştirme hataları (ve bunlardan nasıl kaçınılacağı)
The following mistakes repeatedly appear in homeowner installations and are strongly associated with cable damage, nuisance trips, and daily frustration:
Mistake 1: placing the charger where the cable must cross the main walkway
This increases trip risk and leads to repeated stepping on the cable. A better approach is to place the charger on the port side and route along the wall.
Mistake 2: mounting too low so the connector rests on the floor
Floor contact increases contamination and wear. The connector should be holstered clear of the ground with a stable storage point.
Mistake 3: choosing a “convenient wall” that forces an expensive wiring run
Car and Driver notes that installation cost can rise from a few hundred dollars to a few thousand when electrical capacity or routing complexity demands upgrades. A slightly different wall location can materially reduce total project cost.
Mistake 4: assuming more amps fixes everything
Car and Driver explains charging speed is limited by the lowest of the household circuit, the EVSE, and the vehicle’s onboard charger. Many households benefit more from smart scheduling veya yük yönetimi than from chasing maximum amperage.
Yazdırılabilir planlama şablonu (ölçümler + kontrol listesi)
- Wall-to-charge-port distance (straight park): ________
- Wall-to-charge-port distance (offset park): ________
- Nearest safe conduit path back to panel: ________
- Clearance from doors/track/storage: ________
- Wi?Fi/cellular signal quality at location: ________
- Chosen wall aligns with charge-port side and minimizes cable crossing.
- Charger and holster are protected from impacts and water exposure.
- Cable storage is planned (hook/holder) to keep the floor clear.
- Circuit plan follows continuous-load limits (as described by Car and Driver).
- If capacity is limited, DLB/load management is evaluated before upgrading service.
SSS
1) Where should an EV charger be mounted in a one-car garage?
The most practical location is usually the side wall closest to the vehicle’s charge port, positioned so the cable does not cross the main walking path. This reduces daily friction and minimizes connector wear.
2) Is it better to install an EV charger near the garage door for driveway charging?
If driveway charging is frequent, mounting near the door jamb can provide flexible reach. Car and Driver notes outdoor charging is feasible with proper outdoor ratings (NEMA/IP) and appropriate enclosure for the electrical feed. The cable path under the door must be planned to avoid pinch and abrasion.
3) How does charger placement affect installation cost?
Placement changes wiring distance and complexity. Car and Driver explains that if a home has sufficient spare electrical capacity, installation may be relatively modest; if not, upgrades can raise cost substantially. A location that allows a simpler conduit route typically reduces labor and materials.
4) What amperage should be planned for a garage charger?
Many homes target 32–40A continuous Level 2 charging as a practical overnight tier. Car and Driver recommends modest 40–50A circuits as a balanced approach, and explains the 80% continuous-load rule. Smart Charge America listings also show mainstream home products commonly configured around 40–48A output, with hardwired setups typically enabling higher output.
5) Do two-EV households need two chargers?
Not always. With sufficient overnight dwell time, a single well-placed charger and a managed schedule can be enough. However, the garage layout should anticipate future charging needs; a central mount or a plan for a second circuit can prevent rework.
6) What is Dynamic Load Balancing and how does it affect placement?
Load management can automatically adjust EV charging current to keep total household draw below a safe threshold. Car and Driver highlights load management as a way to avoid panel upgrades, and Smart Charge America describes dynamic adjustment in products that use home energy monitoring. If DLB is planned, placement should ensure reliable connectivity and service access.
7) Is DC fast charging a garage solution?
For most homes, Level 2 AC is the rational choice. Car and Driver notes Level 3/DC fast charging is generally illogical for home use due to cost. DC becomes relevant for special scenarios such as emergency roadside assistance, depots, or temporary locations—use cases aligned with TPSON’s portable DC positioning.
8) How does public charging network design inform garage planning?
Love’s describes adding more DC fast chargers (Level 3) to complement its Level 2 network, reflecting a practical rule: AC serves longer dwell times while DC targets turnaround. In a garage, dwell time is usually long, so the layout should optimize safe, convenient nightly charging rather than highway-style speed.
Özet
The optimal garage charger location is the one that makes nightly charging effortless: short reach to the charge port, minimal cable on the floor, and a wiring path that keeps the electrical scope reasonable. Evidence from testing and market listings shows that most households succeed with mainstream Level 2 outputs and benefit disproportionately from cable management, continuous-load circuit design, ve yük yönetimi Kapasitenin sınırlı olduğu durumlarda.
Ürün kategorisinden uygulamaya yapılandırılmış bir yol için, TPSON portföy özeti Elektrikli Araç Şarj Cihazları,altında düzenlenmiştir, AC EV Şarj Cihazları.altında listelenmiştir. DC EV Şarj Cihazları.
Referanslar ve harici kaynaklar
Aşağıdaki kaynaklar, gerçek ifadeler, teknik özellikler ve örnekler için referans alınmıştır. Doğrulama için harici bağlantılar sağlanmıştır: