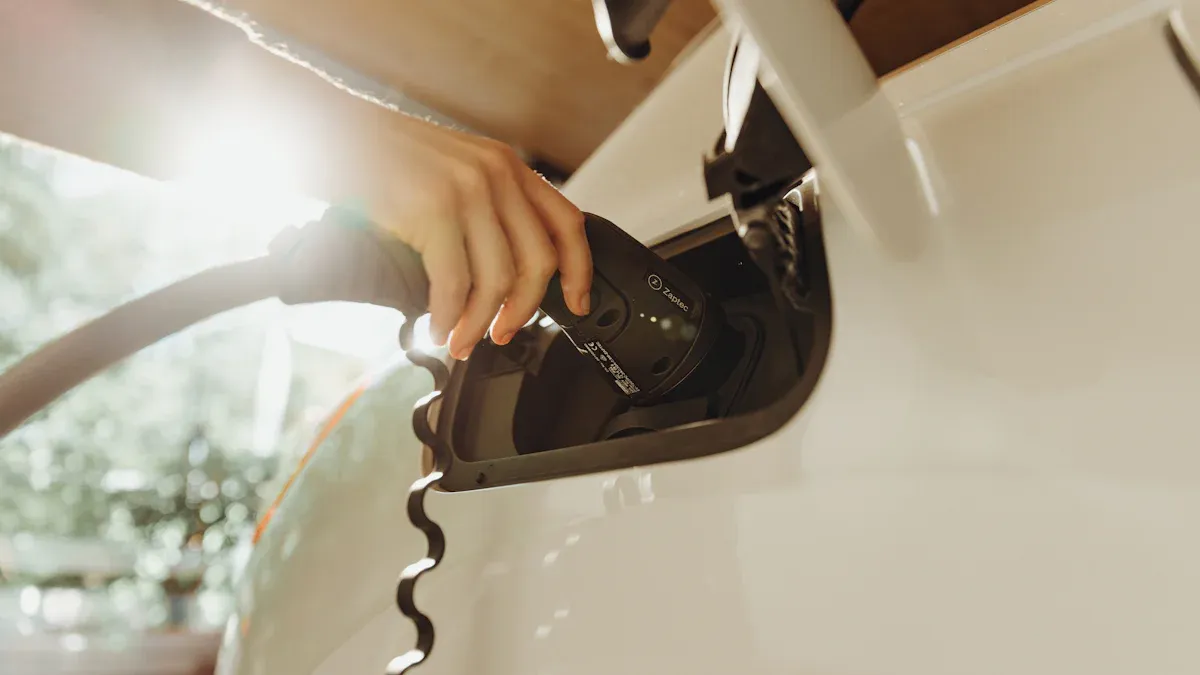

Installing an EV charger at home enables cleaner electric vehicle charging and supports a sustainable lifestyle. Home EV charging gives owners control over energy sources and helps reduce reliance on fossil fuels. People often face several challenges during installation:
- Location selection for a dedicated EV chargepoint may be difficult due to limited space.
- Upgrading electrical capacity for charging your electric car can increase costs.
- Compliance with local regulations and finding qualified EV charger manufacturers may delay the process.
Choosing the right solution makes charging simple and efficient.
Choosing the Right Home EV Charger

Selecting the best home EV charger ensures efficient and safe electric vehicle charging at home. Homeowners should consider charger types, essential features, and compatibility with both their vehicle and property.
Types of EV Chargers for Home Use
Level 1 Home EV Charger
A Level 1 home EV charger uses a standard 120-volt household outlet. This option offers a simple way to install an EV charger without major electrical upgrades. Level 1 chargers typically provide around 3-5 miles of range per hour of charging. They suit drivers with low daily mileage or those who can leave their vehicle plugged in overnight.
Level 2 Home EV Charger
A Level 2 home EV charger operates on a 240-volt supply, delivering much faster charging speeds. Most homeowners prefer this option for daily use. Level 2 chargers can add 15-40 miles of range per hour, depending on the model and power output. These chargers often require professional installation and may need an upgrade to the home’s electrical system.
Tip: Level 2 chargers offer greater flexibility for busy households or multiple electric vehicles.
| Charger Type | Charging Speed (miles/hour) | Suitable For | Cost Range (installed) | Example Models |
|---|---|---|---|---|
| 3.6kW | 15 | Low-mileage drivers | £450-£700 | Project EV 3.6kW |
| 7kW | 25-30 | Most domestic settings | £550-£850 | Smart Home Charge 7kW Pro, Ohme Home Pro |
| 11kW | 35-40 | Homes with three-phase supply | £650-£950 | Smart Home Charge 11kW Pro |
| 22kW | 75-80 | Commercial properties | £950-£1,500 | N/A |

Key Features for EV Charger Installation
Charging Speed and Power Output
Charging speed plays a crucial role in daily convenience. Faster chargers, such as 7kW or 11kW models, reduce the time required to fully charge an electric vehicle. Homeowners should match the power output of the home EV charger to their driving habits and vehicle requirements.
Smart Features and Connectivity
Modern home EV chargers often include smart features. These may allow scheduled charging during off-peak hours, integration with energy tariffs, solar PV compatibility, and usage tracking. Smart connectivity can help homeowners save on energy costs and monitor charging activity.
Weather Resistance for Outdoor Use
Many homeowners install EV chargers outdoors. Weather resistance is essential for safety and durability. Look for chargers with robust enclosures and protection against rain, dust, and temperature extremes.
Note: Chargers rated for outdoor use ensure reliable operation in all seasons.
Ensuring Compatibility with Your Vehicle and Home
Vehicle Charging Port Compatibility
Different electric vehicles use various connector types. Most home EV chargers in the US use a Type 2 connector, which fits the majority of modern EVs. However, some vehicles may require adapters or specific connectors. Choosing the correct connector type ensures seamless communication between the electric vehicle charging station and the car.
Home Electrical System Requirements
Before installing an EV charger, homeowners must assess their electrical systems. The charger’s amperage should match both the vehicle’s maximum acceptance and the home’s capacity. Upgrading the electrical system may be necessary for higher-powered chargers. Proper installation of an electric vehicle charging point ensures safe and effective operation.
| Factor | Description |
|---|---|
| Amperage Compatibility | Ensure the charger’s amperage matches the vehicle’s maximum acceptance and the home’s electrical capacity. |
| Vehicle Compatibility | Check the vehicle’s maximum amperage acceptance, typically between 16 to 80 amps. |
| Home Compatibility | Verify that the home’s electrical infrastructure can support the charger’s amperage rating. |
Homeowners should consult a qualified electrician to evaluate the property’s electrical system before installing a home charger.
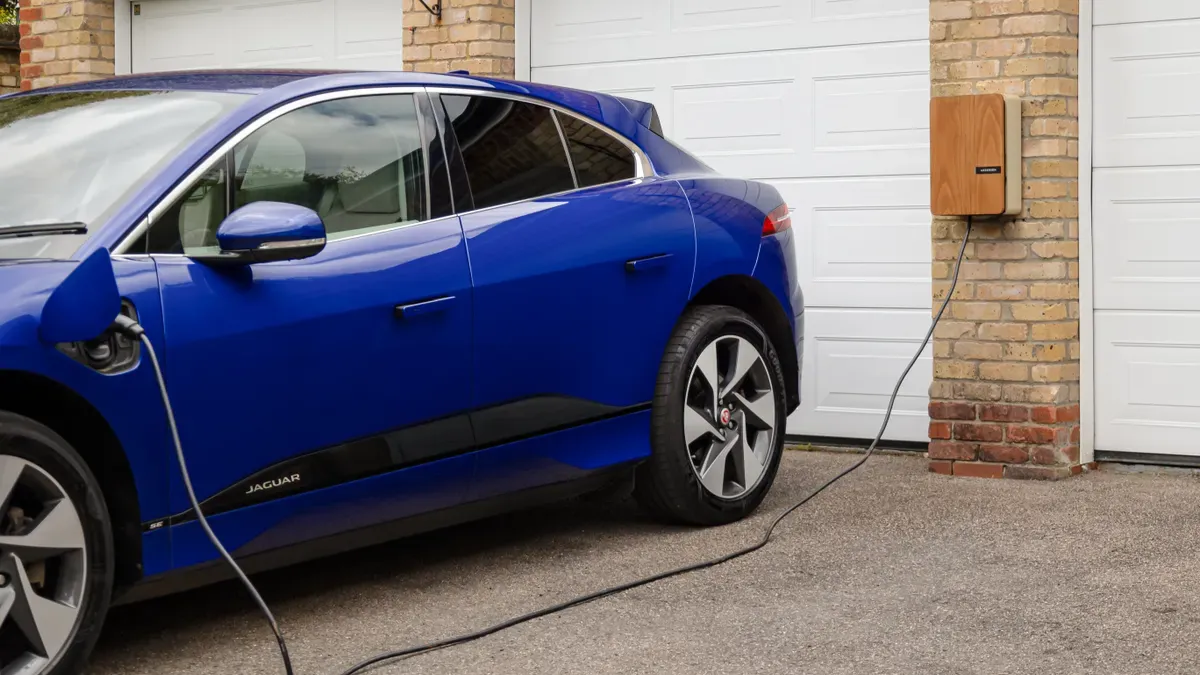
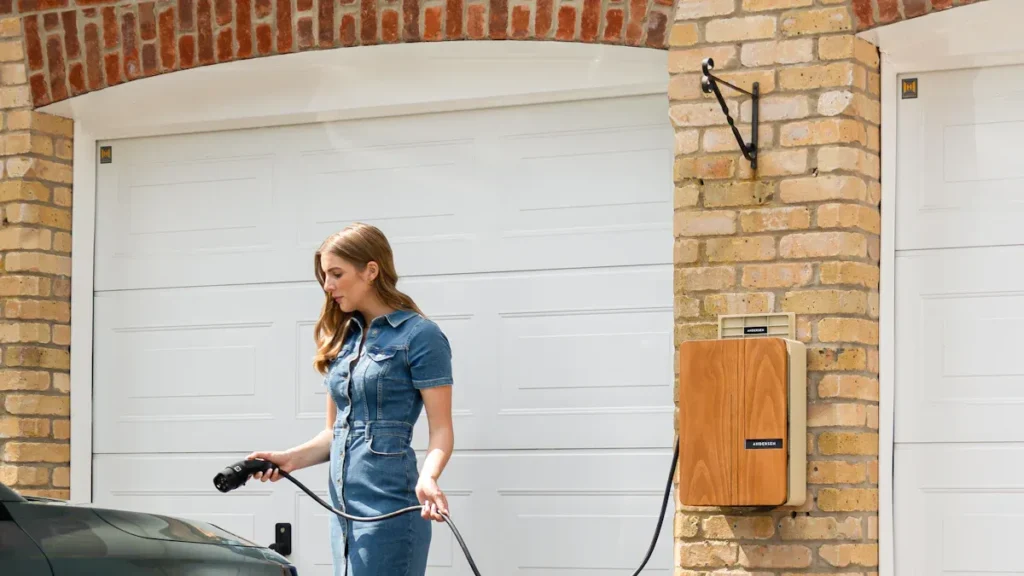
Deciding the Best Location for EV Charger Installation in Your Driveway

Selecting the optimal spot for an EV charger in a driveway requires careful planning. Homeowners should consider accessibility, safety, and future needs to ensure efficient charging and long-term satisfaction.
Accessibility and Convenience
Proximity to Parking Spot
Placing the EV charger close to the regular parking spot reduces cable clutter and makes daily charging easier. A short distance between the charger and the vehicle minimizes the risk of tripping and keeps the installation neat. Homeowners should also check that the location allows easy access to the electrical panel, which simplifies installation and maintenance.
Cable Length and Reach
The cable must reach the vehicle’s charging port comfortably without stretching or creating obstacles. Most home chargers offer cables between 16 and 25 feet. Choosing the right length ensures flexibility for different parking positions and vehicle sizes.
| Factor | Description |
|---|---|
| Proximity to Your Electric Vehicle | Choose a location close to where you park your EV to minimize cable length and reduce hazards. |
| Access to Electrical Power | Ensure the location has easy access to your electrical panel and can support a dedicated circuit for the charger. |
| Shelter from the Elements | Install the charger in a covered area to protect it from weather conditions, ensuring longevity and reliability. |
| Safety Considerations | Select a location free from hazards like standing water and high-traffic areas to prevent accidents. |
| Aesthetics and Curb Appeal | Consider how the charger’s location affects your home’s appearance and choose a spot that blends well with your landscaping or home design. |
Safety and Protection for Your EV Charging Point Installation
Weather Exposure and Shelter
Outdoor installations expose the EV charger to rain, snow, and temperature extremes. A covered area, such as a carport or garage, shields the charger and cables from harsh weather. Cold climates can reduce charging efficiency, so keeping the vehicle and charger in a warmer environment helps maintain performance and lowers energy costs.
- Cold weather may decrease battery range and charging speed.
- Garage parking keeps the ambient temperature higher, improving charging efficiency.
Avoiding Tripping Hazards
Safety remains a top priority during installation. The charging cable should not cross walkways or high-traffic areas. Homeowners can use cable management systems or wall-mounted holders to keep cables organized and off the ground.
| Safety Consideration | Description |
|---|---|
| Electrical Safety Requirements | Include circuit breakers, proper grounding, and GFCI/RCD protection to prevent hazardous currents. |
| Proper Installation | Certified installers follow local building codes and recommend necessary permits. |
| Environmental Protection | Choose chargers rated for extreme temperatures and resistant to environmental factors. |
| Regular Maintenance | Periodic inspections of cables and connectors to identify potential hazards. |
Planning for Future EV Charging Needs
Multiple Vehicle Charging
Many households plan to own more than one electric vehicle. Installing an EV charger with multiple ports or leaving space for additional units supports future expansion. Assessing current and future charging demand helps avoid costly upgrades later.
Upgrading Your EV Charging Point
Future-proofing the electrical infrastructure during the initial installation saves time and money. Homeowners should consider installing higher-capacity wiring or smart charging technology that balances power among several chargers. Flexible site layouts allow for easy addition of new chargers as needs change.
| Step | Description | Tip/Example |
|---|---|---|
| Assess Current and Future Demand | Evaluate current EV usage and predict future needs to establish a foundation for expansion. | Start with a few chargers to meet immediate needs, planning for more as demand grows. |
| Install Future-Proofed Electrical Infrastructure | Ensure your electrical setup can accommodate future chargers to avoid costly upgrades later. | Install infrastructure for future chargers during the initial setup to minimize disruption. |
| Plan for Flexible Site Layout | Design your site to allow for easy addition of chargers without disrupting current operations. | Place chargers in high-traffic areas while reserving space for future installations. |
| Leverage Smart Charging Technology | Use technology that optimizes power distribution among chargers, allowing for expansion without overloading. | Smart charging can help manage costs and provide insights into usage patterns. |
Tip: Planning ahead for multiple vehicles and higher charging capacity ensures the driveway remains functional and organized as needs evolve.
Understanding EV Charger Installation Options
Homeowners can choose between DIY and professional approaches for EV charger installation. Each method presents unique benefits, requirements, and challenges. Understanding these options helps ensure a safe and efficient charging experience.
DIY EV Charger Installation
When DIY Installation Is Feasible
DIY installation appeals to those who want to install an EV charger quickly and save on labor costs. This approach works best for Level 1 chargers, which use a standard outlet and require no special wiring. Homeowners with basic electrical knowledge may attempt Level 2 installations, but only if the home’s electrical system already supports a dedicated 240V circuit. Complex installations or upgrades should always involve a professional.
⚠️ DIY installation is only suitable when the electrical infrastructure meets all safety and code requirements.
Tools and Skills Required
A successful DIY EV charger installation demands the right tools and skills. Homeowners must possess a solid understanding of electrical systems and safety protocols. Essential tools include:
- Voltage tester
- Wire strippers
- Screwdrivers
- Drill and bits
- Conduit bender (for running new wiring)
- Torque wrench
Key skills and precautions include:
| Step/Safety Precaution | Description |
|---|---|
| Ground Fault Protection | Use GFCI outlets to prevent electric shock during charging. |
| Proper Wiring and Conduits | Select the correct wire gauge and protect wiring with conduits. |
| Compliance with Regulations | Follow NEC, UL, and OSHA standards for electric car charger installation. |
| Site Assessment | Check the electrical panel’s capacity and charger location before starting. |
| Use Certified Chargers | Only install chargers tested by recognized safety organizations. |
| Regular Maintenance | Inspect the charger and cables periodically for wear or damage. |
Tip: Even experienced DIYers should consult a licensed electrician before attempting to install an EV charger.
Professional EV Charger Installation
Finding a Certified Installer
Professional EV charger installation ensures compliance with safety codes and optimal performance. Certified installers possess formal education in electrical engineering and complete multi-year apprenticeships. They hold licenses from accredited organizations and stay updated on the latest EVSE technology through ongoing training. The advantages of hiring a profession include:
- Electrical engineering education
- Apprenticeship under a licensed engineer
- Licensing and certification
- Continuous learning through seminars and workshops
A certified installer can assess the site, recommend the right charger, and handle all technical aspects of the installation.
What to Expect During Installation
Professional installers follow a structured process for ev charger installation:
- Site assessment: Evaluate the electrical panel, charging location, and load capacity.
- Permit acquisition: Secure necessary permits and ensure compliance with local codes.
- Electrical upgrades: Install a dedicated 240V circuit if needed.
- Charger mounting: Secure the charger to the wall or pedestal.
- Wiring and connections: Run wiring, install conduits, and connect the charger.
- Testing and commissioning: Verify proper operation and safety features.
- User orientation: Explain charger operation and maintenance.
| Charger Type | Installation Requirements | Process |
|---|---|---|
| Level 1 | Standard outlet, no special requirements | Simple plug-in, no professional installation needed |
| Level 2 | Dedicated 240V circuit, possible panel upgrade | Professional installation recommended, site assessment |
| Level 3 | Industrial-grade power, high cost | Complex, not suitable for residential installation |
Note: Professional installation reduces the risk of electrical hazards and ensures long-term reliability.
Comparing DIY vs. Professional EV Charger Installation
Pros and Cons of Each Method
Choosing between DIY and professional EV charger installation depends on budget, skill level, and safety priorities.
| Aspect | DIY Installation | Professional Installation |
|---|---|---|
| Cost | Lower upfront costs | Higher upfront costs |
| Safety | Higher risk of electrical hazards | Ensures compliance with safety standards |
| Reliability | Potential for mistakes and rework | Greater reliability and support |
- DIY installation saves money but increases the risk of electrical hazards, code violations, and equipment damage.
- Professional installation costs more but guarantees safety, compliance, and often includes warranties.
Homeowners should weigh the risks of DIY installation against the benefits of professional expertise.
Cost and Time Differences
DIY installation typically involves lower upfront expenses, as homeowners avoid labor fees. However, mistakes can lead to costly repairs or even void warranties. Professional installation requires a higher initial investment but minimizes the risk of future problems.
- DIY: Lower cost, higher risk, possible delays if issues arise.
- Professional: Higher cost, faster completion, reliable results.
Common reasons for failed installations include improper wiring, inadequate electrical capacity, and non-compliance with local codes. Professional installers address these issues proactively, ensuring a smooth process.
Investing in professional EV charger installation often saves time and money in the long run, especially for Level 2 chargers or when upgrading electrical systems.
Checking Permissions and Regulations for Home EV Charger Installation
Navigating permissions and regulations forms a crucial step before homeowners install an EV charger in their driveway. Compliance with local codes, association rules, and utility guidelines ensures a safe and legal EV charging point installation.
Local Building Codes and Electrical Permits
Permit Requirements for EV Charging Point Installation
Local building departments require permits for most Level 2 home charging point installations. These chargers need a 240-volt service and a dedicated dual-pole 40-amp circuit. Homeowners must follow a clear process to secure approval:
- Check local requirements with the building department.
- Hire a licensed electrician for the installation.
- Submit an application for the permit.
- Pay the necessary fees, which may range from $50 to $500.
- Schedule an inspection to confirm compliance with codes.
Tip: A permit not only ensures safety but also protects homeowners from future insurance or legal issues related to ev charging point installation.
Zoning and Property Line Considerations
Zoning laws may restrict where a homeowner can install an EV charger. Some municipalities prohibit running charging cables across public pavements, which can create liability for injuries. Standard home insurance policies often exclude incidents involving charging cables, leaving homeowners exposed. Legal protection add-ons may help defend against possible claims.
| Consideration | Impact on Installation |
|---|---|
| Zoning Restrictions | May limit charger placement near property lines |
| Public Pavement Rules | Running cables across sidewalks can create liability |
| Insurance Coverage | Standard policies may not cover cable-related incidents |
Homeowner Association (HOA) and Shared Driveway Rules
Common HOA Restrictions
Homeowner associations often set rules for exterior modifications, including home charging point installations. Restrictions may address visual impact, shared spaces, and safety. Some HOAs require chargers to blend with the property’s aesthetics or prohibit visible cables.
Getting Approval for EV Charger Installation
Homeowners must review HOA guidelines before starting EV charging point installation. The approval process usually involves:
- Submitting a formal request with charger specifications.
- Providing installation plans and locations.
- Waiting for board review and feedback.
Note: Early communication with the HOA helps avoid delays and ensures the home charging station meets community standards.
Utility Company Guidelines for EV Charger Installation
Notifying Your Utility Provider
Utility companies recommend notifying them before installing an ev charger. This step allows the provider to assess the community’s power needs and determine if upgrades are necessary. Providers may also offer advice on selecting a suitable location for the home charging point to ensure equitable access.
Upgrading Electrical Service if Needed
Some installations require greater electrical capacity. The utility company may guide homeowners through the process:
- Assess the scope of work and charging needs.
- Apply for increased electrical service if the current supply is insufficient.
- Estimate costs for installation and ongoing maintenance.
- Train users and offer support for safe charging.
Callout: Utility guidance helps prevent overspending and ensures the EV charging point installation operates safely and efficiently.
Estimating Costs and Finding Incentives for EV Charger Installation
Understanding the financial aspects of installing an EV charger helps homeowners plan effectively. Costs can vary based on charger type, installation complexity, and available incentives.
Home EV Charger Price Ranges
Level 1 vs. Level 2 Charger Costs
Level 1 chargers offer a budget-friendly entry point, but Level 2 chargers provide faster charging and greater convenience. The purchase price for a home EV charger ranges from €299 to €1,149, depending on the brand and features. Level 2 chargers, especially those with smart capabilities, often cost more but deliver significant time savings.
| Cost items | Price |
|---|---|
| Purchase price | €299 – €1,149 |
| Installation | From €399 |
| Costs of a separate charging cable | €160 – €340 |
Where to Purchase a Home EV Charger
Homeowners can buy an EV charger from authorized dealers, online retailers, or directly from manufacturers. Many utility companies and local programs recommend specific brands to ensure compatibility and safety.
EV Charger Installation Fees and Materials
Typical Labor Costs
Installation fees depend on the complexity of the charging setup. Labor costs for a standard Level 2 EV charger installation typically range from $400 to $1,500. More advanced installations, such as those requiring electrical panel upgrades, can increase the total cost.
Additional Materials and Equipment
Additional expenses may include new circuit installation, upgraded electrical panels, permits, and inspections. Smart chargers with Wi-Fi capabilities usually cost $100 to $300 more than basic models.
| Cost Component | Price Range |
|---|---|
| Level 2 Charger Price | $300–$1,200 |
| Smart Chargers (Wi-Fi enabled) | $100–$300 more |
| New Circuit Installation | $200–$800 |
| Upgrading Electrical Panel | $500–$2,000 |
| Labor Costs | $400–$1,500 |
| Permits & Inspections | $50–$500 |
| Average Installation Cost | $500–$2,500 |
Note: Basic installations cost less, while complex projects with upgrades or long cable runs may reach the higher end of the range.
Incentives and Rebates for EV Charging Point Installation
Federal Tax Credits
Federal laws are in a state of constant, change, so make sure to check official government channels for the latest tax credits and incentives. These can help offset the cost of home charger installation and make ownership of EVs more accessible.
State and Local Incentive Programs
Many states and cities provide additional rebates for charging equipment and installation. These policies are always being updated, so make sure to check both state and county policies for EV charging rebates to maximize your savings. While programs like CALeVIP are intended for public charging, make sure to look for out for any residential charging incentives currently available.
Utility Company Rebates
Utility companies often support EV charger adoption with rebates and special programs. PG&E in California provides $500, and DTE Energy in Michigan offers $500 for both the charger and installation when homeowners use qualifying smart chargers. Some utilities require pre-approval or enrollment in time-of-use plans.
- Federal tax credit for home charging station installation.
- Seattle City Light and Clark Public Utilities in Washington State offer rebates for residential charging.
- Austin Energy in Texas covers up to $1,200, including electrical panel upgrades.
Tip: Homeowners should check with local utilities and government agencies to maximize savings on their EV charger installation.
Simple Safety Tips for Home EV Charger Installation and Use
Electrical Safety for EV Charger Installation
Turning Off Power Before Installation
Safety begins with proper preparation. Before installing an EV charger, homeowners must turn off power at the main electrical panel. This step prevents electrical shock and reduces the risk of injury. Licensed Electrical Contractors (LECs) recommend verifying that the circuit is de-energized using a voltage tester. They also advise keeping the charging area clear of flammable materials and clutter to prevent accidents.
- Hire Licensed Professionals: Work with LECs to ensure safe and compliant installation.
- Understand Electrical Codes: Familiarize yourself with local electrical codes and safety standards.
- Obtain Necessary Permits: Secure all required permits from the Electrical Safety Authority before starting work.
Using Proper Equipment and Materials
Using the correct equipment and materials ensures the EV charger operates safely. Installers should select chargers tested by recognized safety organizations and follow manufacturer guidelines for charging practices. Surge protectors help safeguard the charger and vehicle from voltage spikes. Regular equipment inspection identifies potential issues before they become hazards.
- Professional Installation: Always hire a licensed contractor for installation.
- Regular Equipment Inspection: Check charging equipment frequently.
- Follow Manufacturer Guidelines: Adhere to recommendations for safe charging.
Weatherproofing Your EV Charging Point
Choosing Weather-Resistant Chargers
Outdoor installations require weather-resistant EV chargers. Homeowners should select chargers designed for outdoor use, with waterproof ratings that meet necessary standards. The table below highlights recommended weatherproofing measures:
| Recommendation | Description |
|---|---|
| Outdoor-rated chargers | Select chargers built for outdoor durability. |
| Installation under cover | Place the charger under eaves or a carport roof for extra protection. |
| Use of protective covers | Employ shields to prevent water splashes and flooding. |
| Proper electrical setup | Use dedicated circuits with GFCI protection and seal installations. |
| Check IP/NEMA ratings | Verify waterproof ratings for all components. |
Protecting Cables and Outlets
Protecting cables and outlets from moisture and extreme temperatures extends the life of the charging system. Installers should use weather shields and ensure proper sealing around all connections. They must also choose a location that allows easy access and complies with local regulations.
Routine Maintenance for Your Home EV Charger
Inspecting for Wear and Tear
Routine maintenance keeps the ev charger operating efficiently. Visual inspections help identify damage or corrosion on plugs and connectors. Homeowners should check charging cables for cracks, cuts, or kinks to ensure safe charging.
| Maintenance Task | Description |
|---|---|
| Visual Inspections | Check plugs and connectors for damage or corrosion. |
| Cable Checks | Inspect cables for cracks, cuts, and kinks. |
| Monitor Charging Speed | Watch for slow charging rates or error messages. |
| Avoid Overloading | Ensure the charger does not exceed home electrical capacity. |
| Schedule Professional Servicing | Have a licensed technician inspect the charger every 12-24 months. |
Cleaning and General Care
Keeping the EV charger clean prevents dust and debris from affecting performance. Use a damp cloth for cleaning, and avoid harsh chemicals. Scheduling professional servicing every 12 to 24 months ensures optimal charging and safety.
Tip: Regular maintenance and proper care extend the lifespan of your EV charger and support safe charging at home.
Installing an EV charger in a driveway offers homeowners a practical way to charge your car at home. Real estate studies show that homes with charging infrastructure often see increased property value. Many consumers report benefits such as hassle-free overnight charging, long-term savings, and enhanced sustainability. To avoid common mistakes, individuals should hire certified installers, future-proof their setup, and secure necessary permits. Checking local regulations and seeking professional guidance ensures a safe and efficient installation.
FAQ
What is the difference between Level 1 and Level 2 EV chargers?
Level 1 chargers use a standard 120-volt outlet and charge slowly. Level 2 chargers require a 240-volt supply and charge much faster. Most homeowners prefer Level 2 for daily use due to its efficiency.
Can someone install an EV charger without professional help?
They can install a Level 1 charger using a regular outlet. Level 2 chargers often require a licensed electrician for safe installation and code compliance. Professional installation reduces risks and ensures proper operation.
Does installing an EV charger increase home value?
Real estate experts report that homes with EV charging infrastructure attract more buyers. The presence of a charger can enhance property value, especially in areas with high electric vehicle adoption.
Are permits required for home EV charger installation?
Most local authorities require permits for Level 2 charger installation. Permits ensure the work meets safety standards and building codes. Homeowners should check with their city or county before starting the project.
How much does it cost to install a home EV charger?
Costs vary by charger type and installation complexity. Homeowners typically spend between $500 and $2,500 for equipment and labor. Incentives and rebates may lower the total expense.
What maintenance does a home EV charger need?
Routine maintenance includes visual inspections for damage, cleaning with a damp cloth, and checking cables for wear. Scheduling professional servicing every 12 to 24 months helps maintain safety and performance.
Can an EV charger be installed outdoors?
Manufacturers design many EV chargers for outdoor use. Weather-resistant models feature waterproof enclosures and durable cables. Installing under a shelter or using protective covers extends charger lifespan.
Do utility companies offer rebates for EV charger installation?
Many utility companies provide rebates or incentives for installing home EV chargers. Homeowners should contact their provider or visit the utility’s website to learn about available programs and eligibility requirements.