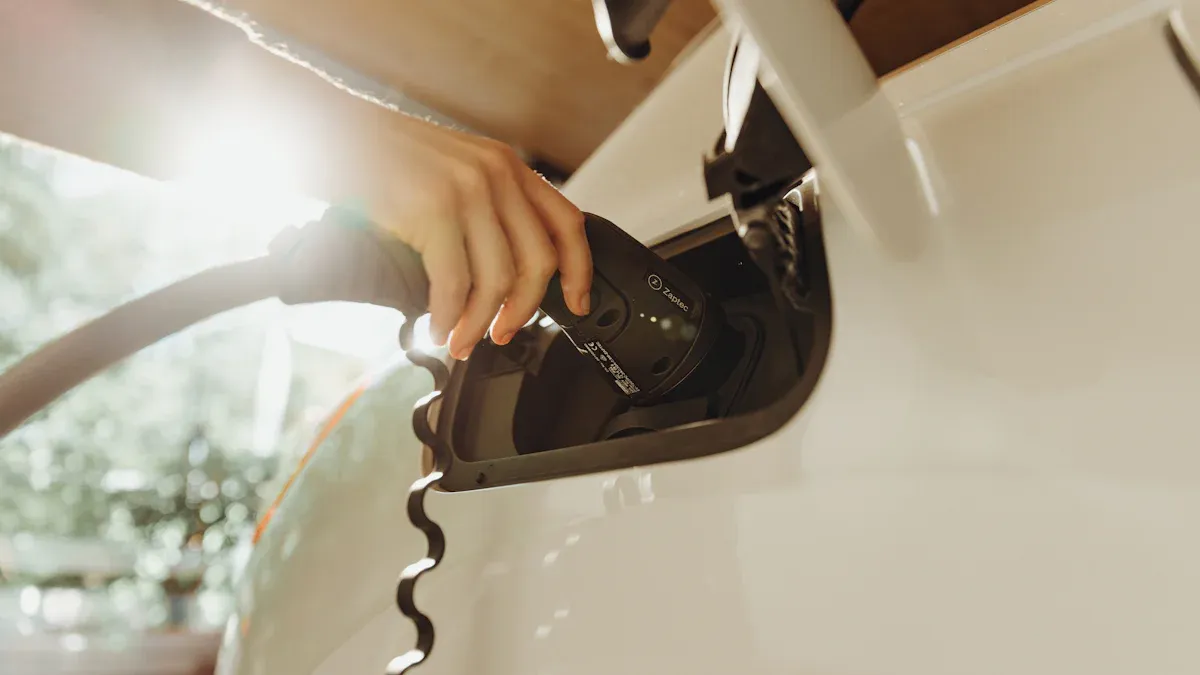

Anda mungkin bertanya-tanya apakah dapat memasang charger kendaraan listrik di rumah secara mandiri. Umumnya terdapat dua pilihan utama:
- Stasiun pengisian EV rumah khusus, yang menawarkan pengisian lebih cepat dan terhubung langsung ke sistem kelistrikan rumah.
- Pengisian melalui stopkontak standar, yang menggunakan outlet biasa tetapi membutuhkan waktu lebih lama dan berisiko membebani sirkuit.
Beberapa produsen Produsen pengisi daya EV merancang produk untuk pemasangan mudah, namun pekerjaan kelistrikan seringkali memerlukan kehati-hatian. Pertimbangkan keterampilan dan kebutuhan keselamatan Anda sebelum memutuskan memasang charger kendaraan listrik atau berkonsultasi dengan profesional berlisensi.
Bisakah Anda Memasang Charger Kendaraan Listrik Sendiri?
Instalasi DIY vs Instalasi Profesional
Anda mungkin mempertimbangkan pemasangan mandiri untuk menghemat biaya dan mengontrol proses lebih banyak. Namun, Anda harus menimbang risiko dan manfaatnya terlebih dahulu. Tabel berikut menyoroti perbedaan kunci antara pemasangan DIY dan profesional:
| Aspek | Instalasi DIY | Instalasi Profesional |
|---|---|---|
| Keamanan | Risiko masalah keselamatan lebih tinggi | Memastikan kepatuhan terhadap standar keselamatan |
| Biaya | Biaya awal lebih rendah, berpotensi ada biaya tambahan akibat kesalahan | Biaya awal lebih tinggi, tetapi dapat menghemat dalam jangka panjang karena keandalan |
| Kontrol | Keterlibatan pribadi lebih besar dalam pemasangan | Kontrol lebih sedikit, namun dengan keahlian profesional |
| Garansi | Dapat membatalkan garansi jika tidak sesuai ketentuan | Sering mencakup garansi dan dukungan |
| Kepatuhan terhadap Peraturan | Risiko pelanggaran kode | Mematuhi kode dan standar lokal |
Jika memilih jalur DIY, Anda harus mengikuti kode bangunan dan peraturan setempat. Ketidakpatuhan dapat menyebabkan bahaya keselamatan, malfungsi kelistrikan, hingga kebakaran. Pemasangan tanpa izin dapat berakibat denda atau keharusan mencabut charger jika inspektor menemukan pelanggaran. Anda juga harus mempertimbangkan izin perencanaan jika rumah termasuk bangunan terdaftar atau berada di kawasan konservasi.
Siapa yang Perlu Mempertimbangkan Pemasangan DIY
Anda sebaiknya hanya mencoba memasang charger mobil listrik jika memiliki kualifikasi dan pengalaman yang tepat. Daftar periksa ini dapat membantu menentukan kesesuaian pemasangan DIY:
- Memiliki kualifikasi kelistrikan yang sesuai seperti edisi ke-18, NVQ, atau Diploma Level 2 dan 3 Instalasi Listrik.
- Terdaftar dalam Skema Orang Kompeten yang menjamin kepatuhan dan keselamatan.
- Memahami Regulasi Kabel BS 7671 dan Bagian P dari Building Regulations.
- Mengetahui cara menilai sistem kelistrikan rumah dan kapasitas panel.
- Menyadari bahwa menjadi instalater OZEV terdaftar dapat membantu memenuhi syarat untuk Electric Vehicle Chargepoint Grant.
Tip: Jika tidak memenuhi kualifikasi ini, sebaiknya jangan mencoba memasang Pengisi daya listrik sendiri. Pekerjaan kelistrikan berbahaya dan memerlukan pengetahuan khusus.
Kapan Harus Memanggil Ahli Listrik Berlisensi
Anda harus memanggil ahli listrik berlisensi jika menemui situasi berikut selama pemasangan:
| Masalah Keselamatan | Deskripsi |
|---|---|
| Kontak simultan | Risiko kontak antara bagian konduktif terbuka kendaraan dengan logam bangunan, menimbulkan bahaya keselamatan. |
| Layanan terpendam | Bahaya potensial saat memasang elektroda bumi, karena layanan terpendam mungkin tidak terdeteksi. |
| Pemisahan tanah | Pemisahan tidak memadai antara elektroda bumi TT dan sistem PME dapat membahayakan keselamatan. |
| Potensi sentuh | Bagian konduktif terpendam dapat memengaruhi potensi tanah, berisiko bagi orang di dekat kendaraan yang sedang diisi. |
A Ahli listrik berlisensi memiliki lisensi aktif dan sertifikasi relevan untuk pemasangan charger EV. Andalkan keahlian mereka untuk memastikan instalasi memenuhi semua standar keselamatan dan persyaratan hukum. Pemasangan profesional juga membantu menghindari kesalahan mahal dan menjamin keandalan operasi charger.
Catatan: Ketidakpatuhan regulasi dapat mengakibatkan denda besar, terkadang hingga £5.000. Selalu periksa hukum setempat sebelum memasang charger kendaraan listrik.
Jenis Opsi Pengisian Mobil Listrik untuk Rumah

Pengisian Kendaraan Listrik Level 1 vs. Level 2
Terdapat dua pilihan utama pengisian rumah: Level 1 dan Level 2. Charger Level 1 menggunakan outlet standar 110V atau 120V dan biasanya memberikan daya 1-2 kW. Dapat menambah jangkauan sekitar 3,5 hingga 6,5 mil per jam, sehingga pengisian hingga 80% membutuhkan lebih dari 40 jam. Charger Level 2 beroperasi pada 240V atau 208V dengan daya 3 kW hingga 20 kW. Level 2 memberikan tambahan 10-30 mil per jam, sehingga pengisian hingga 80% umumnya memakan waktu 4-10 jam.
| Jenis Pengisi Daya | Tegangan | Output Daya (kW) | Jangkauan per Jam (mil) | Waktu Pengisian Daya ke 80% |
|---|---|---|---|---|
| Level 1 | 110V/120V | 1-2 | 3.5 – 6.5 | 40-50+ jam |
| Level 2 | 240V/208V | 3 – 20 | 10 – 30 | 4-10 jam |
Sebagian besar pengemudi memilih Level 2 untuk penggunaan harian karena kecepatan pengisian lebih tinggi. Level 1 mungkin cocok jika Anda berkendara jarak pendek atau menginginkan setup sederhana.
Memilih Pengisi Daya yang Tepat untuk Kebutuhan Anda
Pemilihan charger terbaik bergantung pada kebiasaan berkendara, jenis kendaraan, dan setup rumah. Pertimbangkan beberapa faktor:
- Kecepatan Pengisian DayaKebutuhan Pengisian: Sesuaikan output charger dengan jarak tempuh harian.
- KompatibilitasKompatibilitas Kendaraan: Pastikan charger cocok dengan model EV Anda.
- Persyaratan InstalasiKapasitas Rumah: Periksa kapasitas kelistrikan dan ruang tersedia di rumah.
- Portabilitas dan Fleksibilitas: Tentukan apakah menginginkan charger portabel atau unit tempel dinding.: Decide if you want a portable charger or a wall-mounted unit.
- Connectivity and Smart Features: Look for Wi-Fi or Bluetooth options for monitoring.
- Price and Worth: Balance upfront cost with long-term benefits.
- Garansi dan Dukungan: Choose a charger with strong manufacturer support.
- Efisiensi Energi: Select models with energy-saving features.
You can future-proof your setup by choosing a charger with 30 amps or higher. UL-certified chargers with smart features provide extra safety and convenience. Consulting an electrician helps you evaluate your home’s electrical system before you install an electric vehicle charger.
| Jenis Pengisi Daya | Kecepatan Pengisian Daya | Cocok untuk | Kisaran Biaya | Example Model |
|---|---|---|---|---|
| 3.6kW | Adds ~15 miles/hour | Overnight charging, low-mileage | £450-£700 | Project EV 3.6kW charger |
| 7kW | Adds ~25-30 miles/hour | Sebagian besar pengaturan rumah tangga | £550-£850 | Ohme Home Pro |
| 11kW | Adds ~35-40 miles/hour | Rumah dengan pasokan tiga fase | £650-£950 | Pengisian Daya Rumah Pintar 11kW Pro |
| 22kW | Adds ~75-80 miles/hour | Commercial or rare home setups | £950-£1,500 | N/A |

Tip: If you plan to upgrade your EV in the future, select a charger that supports higher amperage and smart features.
Compatibility with Your Car and Home
You must ensure your charger matches both your vehicle and your home’s electrical system. Check your EV’s connector type, such as J1772, CCS1, CHAdeMO, or NACS, to confirm compatibility. Verify that the charging speed aligns with your car’s specifications. Choose a charging station with an amperage rating equal to or slightly higher than your EV’s capacity for optimal performance.
- Check your EV’s connector type for compatibility.
- Verify charging speed matches your vehicle’s specifications.
- Opt for a charger with suitable amperage for your car.
- Consider future EV purchases when selecting a Level 2 charger.
You should also assess your home’s electrical panel and wiring. Some homes may require upgrades to support faster electric car charging. Planning ahead ensures you avoid costly changes later.
What You Need to Install an Electric Car Charger
Essential Equipment and Tools for Installation
The Charger Unit and Accessories
You need to select a reliable charger unit before you install an electric vehicle charger at home. Choose a Level 2 charger from a trusted source and confirm it is UL or CSA certified. Decide if you want a plug-in or hardwired unit based on your home’s setup and your vehicle’s charging capacity. Many garages already have a 240V outlet, but if yours does not, an electrician can install one for you.
The level 2 charger needs a 240V outlet, which many garages generally have. If you don’t have a 240V outlet, your electrician will make sure to install one.
Electrical Tools and Supplies
You will need several tools and supplies for installing electric car charging stations. Gather the following:
- Screwdrivers and a drill
- Voltage tester and wire strippers
- Conduit, junction boxes, and mounting hardware
- Proper gauge wiring for your charger’s amperage
- Circuit breakers rated for your charger
Always use quality equipment to ensure safety and long-term reliability.
Safety Gear and Precautions
Safety must come first when you install an EV charger. Wear insulated gloves and safety glasses. Use a voltage tester before touching any wires. Never work on live circuits. If you feel unsure at any step, stop and contact a licensed electrician.
Checking Your Home’s Electrical System
Power Requirements and Circuit Breakers
Check your home’s electrical panel to see if it can handle the extra load from electric vehicle charging. Look at the panel’s label to find its total amperage. For example, if your panel is rated for 100 amps and your home already uses 80 amps, adding a 40-amp charger could overload the system. Calculate your current load by listing all major appliances and their power consumption.
Assessing Electrical Panel Capacity
A licensed electrician can perform a load calculation to determine if your panel supports the charger. They will measure your current load, inspect the panel’s condition, and recommend upgrades if needed. Always plan for future needs, such as more appliances or another electric vehicle.
Permits and Local Regulations for Electric Vehicle Charging
Before installing electric car charging stations, check local building codes and permit requirements. Many areas require you to submit an application and pay a fee, which can range from $50 to $500. Some locations mandate that a licensed electrician completes the installation and passes an inspection. Permits ensure your installation meets safety standards and protects your investment.
Local building codes and regulations vary by area and must be checked before installation. Significant electrical system modifications typically require a permit to ensure safety compliance.
Step-by-Step Guide to Install an EV Charger

Perencanaan dan Persiapan
Proper planning ensures a smooth and safe installation process. You should start by evaluating your home’s readiness and identifying the best approach for your needs.
Assessing Your Parking Area
Begin by examining your parking space. Look for a spot close to where you usually park your electric vehicle. This minimizes cable length and reduces tripping hazards. Make sure the area is free from standing water and away from high-traffic zones. If you plan to install an pengisi daya kendaraan listrik outdoors, check for overhead protection or consider adding a cover to shield the unit from rain and snow.
Measuring Cable Lengths and Placement
Measure the distance from your electrical panel to your chosen charging location. Shorter cable runs reduce installation costs and energy loss. Use a tape measure to determine the exact length needed for both the wiring and the charging cable. Plan the cable route to avoid obstacles and ensure easy access for charging an electric car. Mark the intended path on the wall or floor to visualize the setup before you begin.
Tip: Always add a few extra feet to your cable length to allow for flexibility in parking and charger placement.
Choosing the Best Location for Electric Car Charging
Selecting the right spot for your charger impacts convenience, safety, and long-term performance. Consider these factors when deciding where to install your unit:
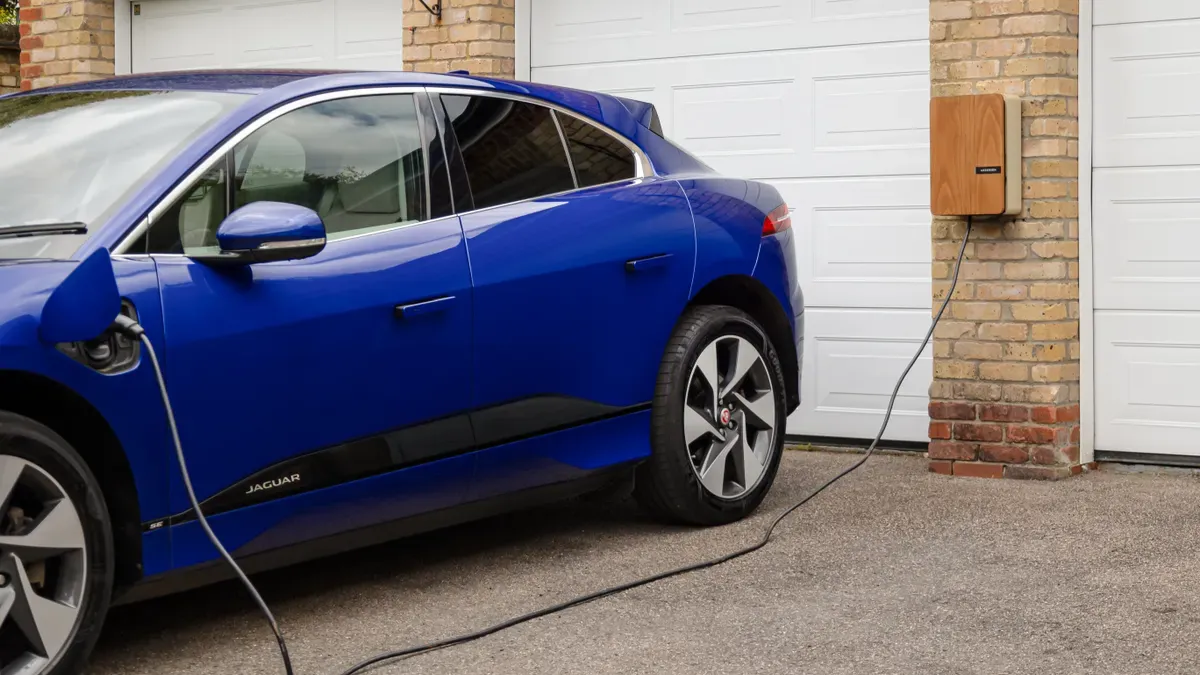
Pemasangan di dalam ruangan vs. di luar ruangan
Indoor installations, such as in a garage, offer natural protection from weather and extend the life of your charger. You also gain added security and easier access. Outdoor installations require weatherproof equipment and may need additional safety measures. Choose a location that keeps the charger close to your parking spot and within reach of your electrical panel.
Weatherproofing and Safety Tips
If you install an EV charger outdoors, select a model rated for outdoor use. Look for chargers with a NEMA 4 or IP66 rating to ensure resistance to dust and water. Mount the unit at least 18 inches above ground level to prevent water damage. Use conduit to protect exposed wiring. Avoid placing the charger near sprinklers or areas prone to flooding. Always follow local codes to ensure compliance and safety.
Note: Local regulations may dictate minimum distances from property lines or require specific mounting heights. Check with your local authority before starting.
How to Install an Electric Vehicle Charger
Once you have planned and prepared your site, you can move on to the installation process. Follow these steps for a safe and efficient setup.
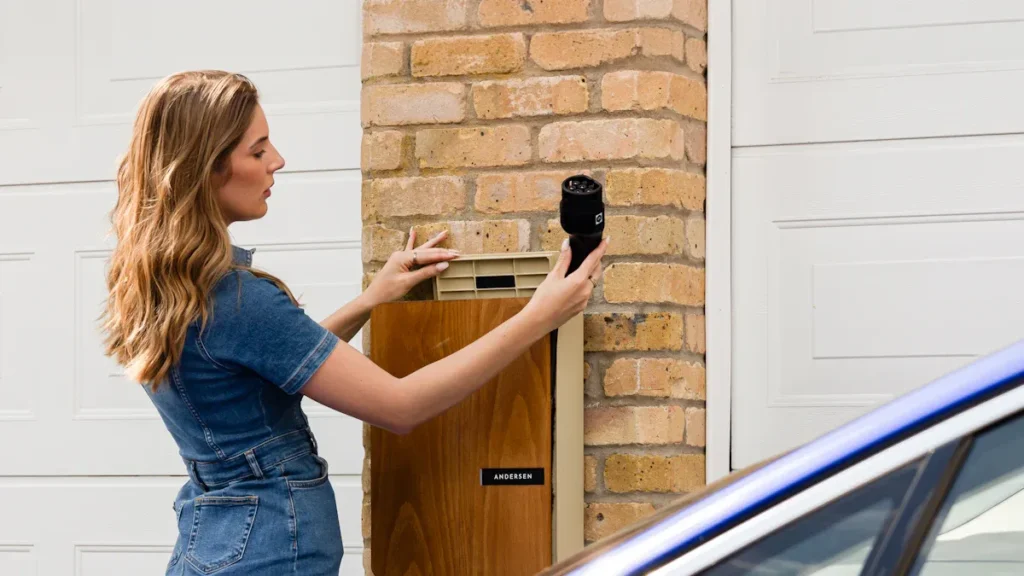
Pemasangan Unit Pengisi Daya
- Use a stud finder to locate wall studs or a solid mounting surface.
- Mark the mounting holes according to the charger’s template.
- Drill pilot holes and secure the mounting bracket with appropriate hardware.
- Attach the charger unit to the bracket, ensuring it sits level and firmly against the wall.
Callout: Always use the mounting hardware provided by the manufacturer to maintain warranty coverage.
Wiring and Electrical Connections
- Turn off power at the main electrical panel before starting any wiring work.
- Run conduit from the panel to the charger location, following the marked path.
- Pull the correct gauge wire through the conduit, matching the amperage requirements of your charger.
- Install a dedicated circuit breaker in your panel for the charger.
- Connect the wires to the charger according to the manufacturer’s instructions, ensuring all connections are tight and secure.
- Double-check all wiring for accuracy and safety before restoring power.
Safety Alert: If you feel unsure about any step, contact a licensed electrician. Working with high-voltage electricity can be dangerous without proper training.
By following these steps, you can install an electric vehicle charger that meets your needs and complies with local regulations. Careful planning, proper equipment, and attention to safety help you enjoy reliable electric vehicle charging at home.
Testing and Final Checks for Electric Vehicle Charging
After you finish installing electric car charging stations, you need to perform a series of tests and checks to ensure everything works safely and efficiently. This process helps you catch any issues before you start charging an electric car regularly.
Powering Up Safely
You should always approach the first power-up with caution. Follow these steps to make sure you activate your charger safely:
- Double-Check All Connections: Inspect every wire and terminal. Make sure all connections are tight and secure. Loose wires can cause overheating or electrical faults.
- Turn On the Circuit Breaker: Restore power at your main electrical panel. Stand to the side and use one hand to flip the breaker, reducing risk in case of a fault.
- Observe for Issues: Watch for any unusual sounds, sparks, or smells. If you notice anything abnormal, turn off the power immediately and consult a licensed electrician.
- Check RCD Protection: Confirm that your charger has Residual Current Device (RCD) protection. Use a 30mA Type B RCD or a Type A/F with RDC-DD DC protection. This device helps protect you from electric shock and meets modern safety standards.
- Schedule the Inspection: Contact your local municipality to arrange an official inspection. An inspector will review your installation, checking all electrical work and upgrades for compliance.
Tip: Never skip the inspection step. Passing this inspection ensures your charger meets local codes and is safe for daily use.
Verifying Charger Operation
Once you power up the system, you need to verify that your electric vehicle charging setup operates as intended. Use the following checklist to guide your final checks:
- Compliance Inspection: Make sure your installation follows BS 7671 and Section 722 standards for EV charging. The inspector will look for proper wiring, grounding, and protection devices.
- Pengujian Listrik: Perform live polarity tests, earth loop impedance tests, and RCD tests using appropriate equipment. These tests confirm that your charger is wired correctly and that safety devices function as required.
- Power Test: Plug in your electric vehicle and check that the charger delivers the correct amount of power. Monitor the charging speed and ensure the system does not trip the breaker.
- Charging Test: Let your vehicle charge for several minutes. Watch for error messages on the charger or your vehicle’s dashboard. Confirm that the charger maintains a stable connection and delivers consistent power.
- Network Connectivity Test: If your charger includes smart features, connect it to your home Wi-Fi or Bluetooth. Test the app or monitoring system to verify remote control and data tracking work properly.
Note: If you encounter any issues during these tests, stop using the charger and contact a professional. Never ignore warning lights or error codes.
After you pass all tests and the official inspection, your charger is ready for daily use. You can now enjoy the convenience and efficiency of charging an electric car at home, knowing your installation meets all safety and performance standards.
Safety Tips for Installing an Electric Vehicle Charger
Electrical Safety Basics
You must prioritize safety when installing an electric vehicle charger. High-voltage equipment can cause serious injuries if you do not follow proper procedures. Always use certified charging equipment to reduce the risk of electrical hazards. Grounding creates a safe path for electrical surges and protects both you and your vehicle. You should work with a licensed electrician who understands the unique requirements of EV installations. This approach helps you avoid risks such as electrocution and fire.
Here are the most important electrical safety practices:
| Safety Practice | Deskripsi |
|---|---|
| Equipment Quality | Use high-quality, certified charging equipment to prevent hazards. |
| Perawatan Rutin | Conduct periodic checks for wear and tear, ensuring all components are secure and functional. |
| Kesiapsiagaan Darurat | Know how to respond to electrical faults and have a plan for shutting off power if needed. |
Tip: Recognize the high energy demands of EV chargers. Never underestimate the importance of proper grounding and compliance with safety standards.
You should also inspect your installation regularly. Look for signs of wear or damage and address issues immediately. Emergency preparedness means knowing how to shut off power quickly if you detect a fault.
Kesalahan Umum yang Harus Dihindari
Many homeowners make mistakes during installation that can lead to safety hazards or costly repairs. You must avoid shortcuts and always follow local regulations. Neglecting to obtain required permits or ignoring zoning laws can result in fines and delays. Miscalculating load capacity may overload your electrical system, so partner with local utilities for accurate estimates.
Kesalahan umum meliputi:
- Skipping proper grounding installation, which can lead to electric shocks and equipment damage.
- Failing to comply with electrical codes and regulations, risking future problems and unsafe conditions.
- Neglecting evaluation of incoming electricity, which ensures voltage and amperage meet code requirements.
- Taking unsafe shortcuts to save costs, increasing the risk of legal issues and safety hazards.
- Failing to train and supervise anyone assisting with installation, which can compromise safety and efficiency.
⚡ Always check that your charger installation meets all local codes and standards. Proper grounding and accurate load calculations protect your home and vehicle.
Signs You Need Professional Help
You may encounter warning signs during installation that indicate you need professional assistance. Frequent circuit breaker tripping suggests your electrical system cannot handle the additional load from the EV charger. Dimming or flickering lights point to a system stretched beyond capacity. Overheating outlets or wiring pose a serious fire hazard and signal an overloaded circuit. Slow charging speeds may mean your system cannot deliver adequate power.
- Frequent circuit breaker tripping
- Dimming or flickering lights
- Overheating outlets or wiring
- Slow charging speeds
🚨 If you notice any of these signs, stop the installation and contact a licensed electrician immediately. Professional help ensures your safety and protects your investment.
By following these safety tips, you create a secure environment for charging your electric vehicle at home. You reduce risks and ensure reliable performance for years to come.
Cost Breakdown for Installing an Electric Car Charger
Biaya Peralatan dan Pengisi Daya
When you plan your home charging setup, you need to consider the price of the charger itself. The cost depends on the type and power level you choose. For a Level 1 charger, you can expect to pay between $300 and $600 for the equipment. Most Level 1 setups use a standard outlet, so you may not need extra hardware. However, the overall cost, including basic installation, often reaches around $1,000.
If you want faster charging, a Level 2 charger offers more power and convenience. The equipment for a Level 2 charger usually ranges from $600 to $1,200 or more. In the UK, the average cost for a standard 7kW home EV charger installation is about £1,110. If you qualify for government grants, you can reduce this to around £760.
- Level 1 charger: $300–$600 (equipment), about $1,000 total
- Level 2 charger: $600–$1,200+ (equipment)
- UK 7kW charger: ~£1,110 (can drop to £760 with grants)
Tip: Always check if your local area offers rebates or grants for EV charger purchases. These incentives can lower your upfront costs.
Installation Costs: DIY vs. Professional
You have two main options for installation: do it yourself or hire a professional. If you choose the DIY route, you can save on labor costs. However, mistakes during installation may lead to extra expenses for repairs or code violations. You must have the right skills and tools to complete the job safely.
Professional installation costs more at first, but you gain peace of mind and reliable results. A certified electrician ensures your charger meets safety standards and local codes. This approach can prevent costly problems in the future.
- DIY installation: Lower labor costs, risk of extra expenses if errors occur
- Professional installation: Higher initial cost, increased reliability and safety
Note: If you lack electrical experience, hiring a professional is the safest choice. You protect your investment and avoid hazards.
Biaya Izin dan Pemeriksaan
Before you install a home EV charger, you need to factor in permit and inspection fees. These costs vary by location. Most permit fees range from $50 to $300, but some areas may charge up to $500. The permit process ensures your installation meets safety standards and local regulations. After installation, an inspection confirms that your system operates safely.
- Permit fees: $50–$300 (sometimes up to $500)
- Inspection: Confirms compliance with safety codes
Callout: Always include permit and inspection fees in your budget when calculating the total cost to install an electric car charger.
Ways to Save Money on Electric Vehicle Charging
You can significantly reduce your electric vehicle charging costs by making informed choices and taking advantage of available programs. Many homeowners overlook simple strategies that can lead to substantial savings over time.
Start by charging at home whenever possible. Home charging usually costs less than using public charging stations. You control when and how you charge, which allows you to optimize your energy use.
- Take advantage of off-peak electricity rates. Many utility companies offer time-of-use tariffs. These plans charge lower rates during specific hours, usually late at night or early morning. By scheduling your EV charging during these off-peak times, you can cut your electricity bill without changing your driving habits.
- Utilize rebate programs and incentives. Federal and state governments often provide financial incentives for EV charger installation. For example, the 30% Alternative Fuel Vehicle Refueling Property Credit can offset a significant portion of your upfront costs. Some local utilities also offer rebates or discounts for installing approved charging equipment.
- Integrate smart home technologies. Smart chargers and energy management systems help you monitor and control your charging sessions. These tools allow you to automatically schedule charging during the cheapest hours and avoid peak demand charges. Many smart chargers also provide real-time data, so you can track your energy use and adjust your habits for maximum efficiency.
💡 Tip: Check with your local utility provider to see if they offer special EV charging rates or incentives. Many companies have dedicated programs for electric vehicle owners.
You can also consider installing solar panels to further reduce your charging costs. After the initial investment, solar energy provides free electricity for your home and vehicle. If you add a solar battery, you can store excess energy during the day and use it to charge your EV at night. This approach minimizes your reliance on the grid and protects you from rising energy prices.
Here is a quick comparison of cost-saving strategies:
| Strategi | Potensi Penghematan | Manfaat Tambahan |
|---|---|---|
| Pengisian daya di luar jam sibuk | 20–50% on electricity | Reduces grid strain |
| Rebates and tax credits | Up to 30% of costs | Lowers upfront investment |
| Teknologi pengisian daya pintar | 10–30% on bills | Improves energy management |
| Solar panel integration | Long-term free energy | Increases home value, sustainability |
You should also choose a Level 2 charger for your home. Level 2 chargers work more efficiently and can lower your overall charging costs by reducing the time your vehicle spends plugged in. Efficient charging not only saves money but also extends the lifespan of your EV battery.
By combining these strategies, you can make electric vehicle ownership more affordable and sustainable. Take time to research your options and tailor your charging habits to maximize your savings.
Troubleshooting and Maintaining Your Electric Vehicle Charger
Common Installation Issues
You may encounter several challenges when installing your electric vehicle charger at home. Addressing these issues early ensures safe and reliable charging. The table below highlights the most frequent installation problems and their descriptions:
| Installation Issue | Deskripsi |
|---|---|
| Electrical System Assessment | You must confirm your home’s electrical system can handle the charger’s load. |
| Kapasitas Panel | Older electrical panels may lack the capacity for a new charger and require an upgrade. |
| Wiring and Circuits | Level 2 chargers need a dedicated 240-volt circuit, which often means installing new wiring. |
| Surge or Grounding Protection | You need proper surge and grounding protection to prevent fires or damage to your vehicle. |
You might also face hardware faults, such as chargers failing from high loads. Firmware problems can disrupt charging, especially if the station’s software is outdated. Poor Wi-Fi connectivity often affects smart chargers, limiting remote features. Faulty switchgear, like malfunctioning RCDs or RCBOs, can cause erratic charging or safety risks.
⚡ Tip: Always check your charger’s hardware and software after installation. Stable Wi-Fi and updated firmware help prevent many common issues.
Routine Maintenance Tips
Regular maintenance keeps your EV charger running efficiently and safely. You should follow these best practices:
- Monitor charging speed to ensure it matches the manufacturer’s specifications.
- Verify that your charger stays connected to its network for smart features.
- Perform load testing to check performance under heavy use.
- Keep firmware and software up to date for optimal operation.
- Inspect weatherproofing and environmental seals to prevent water or dust damage.
- Practice good cable management to avoid unnecessary wear.
- Review compliance and certification to maintain safety standards.
Seasonal checks also matter. In winter, inspect wiring and connections for wear, and confirm ground fault interrupters work properly. In summer, look for overheating, exposed wiring, or corrosion.
🛠️ Catatan: Schedule a quick inspection every few months. Preventive care reduces the risk of unexpected failures and extends your charger’s lifespan.
When to Upgrade or Replace Your Charger
Anda harus consider upgrading or replacing your charger as technology evolves and your needs change. Look for these signs:
- Newer chargers offer faster charging speeds and improved efficiency.
- Your current charger may not support the latest EV models.
- Smart charging features and vehicle-to-grid capabilities can enhance your charging experience.
If you notice your charger struggles to keep up with your driving habits or you plan to purchase a new EV, upgrading ensures compatibility and better performance. Staying current with technology also improves safety and convenience.
🚗 Callout: Upgrading your charger keeps your home charging setup future-ready and maximizes your investment in electric mobility.
Installing your own electric vehicle charger brings convenience, cost savings, and sustainability to your home. You should focus on essential features for a successful setup:
| Fitur | Manfaat |
|---|---|
| PEN fault protection | Prevents electrical hazards |
| Remote locking | Enhances security |
| Integrasi tenaga surya | Enables free charging |
| Pengisian daya terjadwal | Mengurangi biaya energi |
If you lack electrical expertise, hiring a qualified professional ensures compliance and safety. Always conduct thorough testing, train users on safe operation, and notify your local grid operator. Careful planning and attention to detail help you achieve a safe, smooth installation.
PERTANYAAN YANG SERING DIAJUKAN
What is the difference between a plug-in and a hardwired EV charger?
A plug-in charger connects to a dedicated outlet, so you can move or replace it easily. A hardwired charger connects directly to your electrical system. You get a more permanent installation and often better weather resistance for outdoor use.
Apakah saya memerlukan izin untuk memasang pengisi daya EV di rumah?
Most cities require a permit for EV charger installation. You should check with your local building department before starting. Permits ensure your installation meets safety codes and protects your home from electrical hazards.
Can I use an extension cord with my EV charger?
You should never use an extension cord with an EV charger. Extension cords can overheat and cause fires. Always connect your charger directly to a dedicated outlet or circuit for safe operation.
Berapa lama waktu yang dibutuhkan untuk mengisi daya mobil listrik di rumah?
Charging time depends on your charger type and vehicle. Level 1 chargers add about 3–5 miles of range per hour. Level 2 chargers add 10–30 miles per hour. Check your vehicle’s manual for exact charging times.
Apakah memasang pengisi daya listrik akan meningkatkan tagihan listrik saya?
Charging your EV at home will increase your electricity use. You can manage costs by charging during off-peak hours. Many utility companies offer special rates for EV owners. Review your energy plan to find the best option.
Can I install a Level 2 charger if I have an older electrical panel?
You may need to upgrade your electrical panel to support a Level 2 charger. An electrician can assess your panel’s capacity and recommend solutions. Never overload your system, as this can create safety risks.
Perawatan apa yang diperlukan untuk pengisi daya EV di rumah?
Anda harus memeriksa pengisi daya secara berkala untuk keausan, kerusakan, atau koneksi yang longgar. Bersihkan unit dan kabel sesuai kebutuhan. Perbarui firmware jika pengisi daya Anda mendukung fitur pintar. Jadwalkan inspeksi profesional jika Anda melihat masalah apa pun.
Apakah aman memasang pengisi daya EV di luar ruangan?
Ya, Anda dapat memasang pengisi daya EV di luar ruangan jika menggunakan model yang dinilai untuk penggunaan luar ruangan. Cari pengisi daya dengan peringkat tahan cuaca seperti NEMA 4 atau IP66. Pasang pengisi daya di atas permukaan tanah dan lindungi kabel dengan saluran konduit.