

Electric vehicle sales in Chile have more than doubled in the last year, a clear sign of the nation’s accelerating shift to e-mobility. This rapid growth in electric vehicles increases the demand for reliable charging infrastructure. For new owners, choosing the best Pengisi daya listrik involves several practical steps. The process requires evaluating everything from the charger itself to your home’s electrical setup. A proper home EV charger ensures maximum convenience and efficiency.
Catatan: Selecting the right EV Charger from various Produsen pengisi daya EV and their Solusi pengisian daya kendaraan listrik, including options like pengisi daya EV portabel, is a critical decision for every new owner.
Step 1: Assess Your Electric Vehicle’s Charging Capabilities
Sebelum selecting a home charger, an owner must first understand their vehicle’s specific needs. The car itself sets the primary limits for charging speed and efficiency. A clear understanding of these capabilities prevents overspending on unnecessary equipment and ensures a satisfactory ownership experience.
On-Board Charger (OBC) Capacity
Finding Your EV’s Maximum AC Charging Rate (kW)
Every electric vehicle contains an On-Board Charger (OBC). This component converts Alternating Current (AC) from a home outlet or wallbox into Direct Current (DC) to store in the battery. The OBC has a maximum power rating, measured in kilowatts (kW), which dictates the fastest AC charging speed the car can accept. Owners can typically find this information in the vehicle’s manual, on the manufacturer’s official website, or on the specification sheet provided at purchase. Common OBC ratings for electric vehicles in Chile are 7.4 kW or 11 kW.
Why Your Charger Should Match the OBC
The actual charging speed is always determined by the slowest component in the chain. An EV will only draw power at the maximum rate its OBC allows, regardless of the charger’s capacity. Connecting a car with a 7.4 kW OBC to a 22 kW charger will still result in a charging speed of only 7.4 kW. Matching the charger’s output to the vehicle’s OBC capacity optimizes the entire electric vehicle charging process. This alignment ensures the owner is not paying for a more powerful charger the vehicle cannot fully utilize.
Key Factors Influencing Charging Speed ⚡ Several variables can affect the final charging rate:
- The maximum power available from the home’s electrical panel.
- The power rating of the charging cable and its connector.
- The vehicle’s maximum acceptance rate (set by the OBC).
- Ambient temperature, as extreme heat or cold can cause the system to slow down charging to protect the battery.
Battery Size and Daily Driving Habits
Calculating Your Daily Energy Needs (kWh)
Next, an owner should evaluate their daily driving patterns. This helps determine the amount of energy (kWh) that needs to be replenished each night. The calculation is straightforward:
Daily Distance (km) × Vehicle's Energy Consumption (kWh/km) = Daily Energy Need (kWh)
For example, if a person drives 50 km per day in a car that consumes 0.18 kWh/km, their daily energy need is 9 kWh.
Determining Your Ideal Charging Speed
Knowing the daily energy need helps define the ideal charging speed. A standard 7.4 kW charger can deliver approximately 7.4 kWh of energy in one hour. To replenish the 9 kWh from the example above, this charger would take about 1 hour and 15 minutes. This speed is more than sufficient for most overnight charging scenarios, making it a practical and cost-effective choice for many drivers. Assessing these personal requirements is crucial for selecting a unit with adequate fast charging capabilities for daily use.
Step 2: Understand EV Charger Levels in Chile
After assessing the vehicle, the next step is understanding the types of charging available. In Chile, home charging solutions are categorized into two main levels. Each level offers a different charging speed and is suited for different user needs. This choice is a fundamental part of building a reliable personal charging infrastructure.
Level 1 Charging (Portable, Slow)
Using a Standard Household Outlet (Enchufe Doméstico)
Level 1 charging uses a pengisi daya portabel that plugs directly into a standard 220V household outlet, known in Chile as an enchufe doméstico. This method requires no special installation. Most electric vehicles include a Level 1 portable charger upon purchase. It is the simplest way to charge an EV.
Expected Range per Hour (5-8 km)
The primary drawback of Level 1 is its slow speed. This type of charger typically adds only 5 to 8 kilometers of range for every hour of charging. Replenishing a significant amount of battery capacity can take more than 24 hours, making it impractical for daily use for many drivers.
When Level 1 is a Viable Option
Level 1 charging is a suitable solution for specific scenarios. It works well for plug-in hybrid vehicles (PHEVs) with smaller batteries. It can also serve as a backup charging method or for EV owners who drive very short distances each day and can leave the car plugged in for extended periods, such as over a weekend.
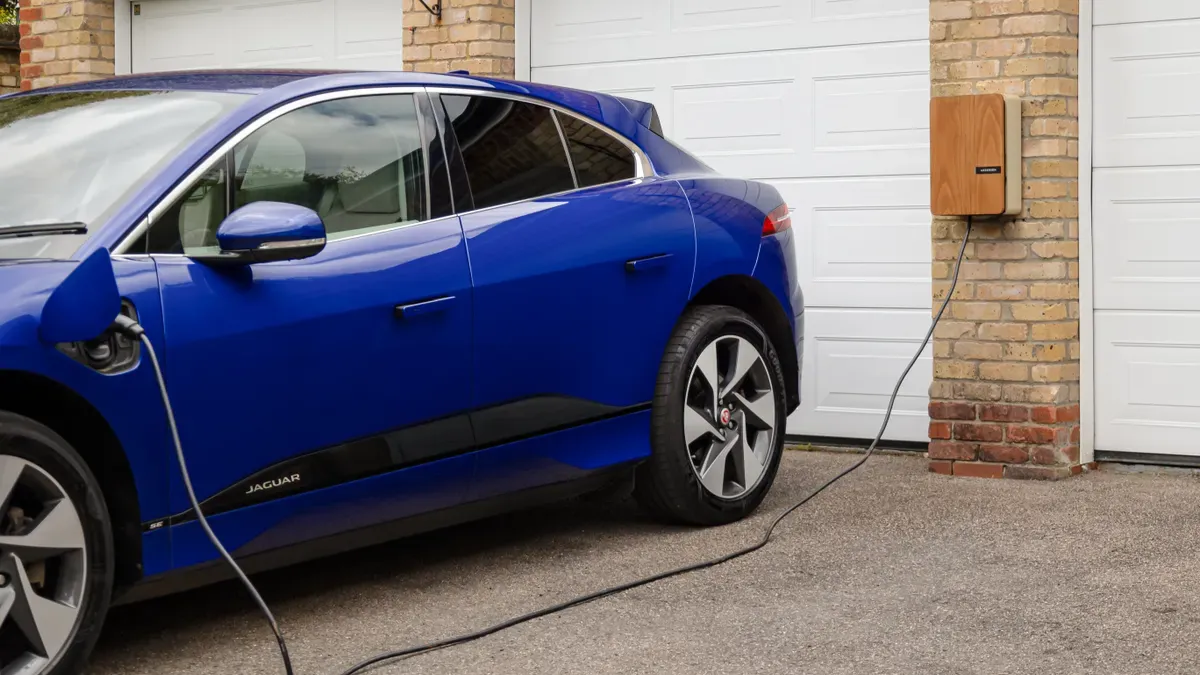
Level 2 Charging (Wallbox, Fast)
The Recommended Standard for Home Charging
Level 2 charging is the recommended standard for most EV owners in Chile. It involves a dedicated, wall-mounted charger, often called a “wallbox.” This pengisi daya ev rumah connects to a dedicated 240V circuit, similar to one used for an electric oven. This setup provides much faster and more efficient charging than a standard outlet.
Expected Range per Hour (30-60 km)
A Level 2 charger dramatically reduces charging times. Depending on the vehicle and the home’s electrical supply, it can add between 30 and 60 kilometers of range per hour. This speed ensures that even with a nearly empty battery, the vehicle can be fully charged overnight. This level of fast charging makes it a reliable solution for daily driving needs, complementing public charging stations.
Benefits of a Dedicated Wallbox
Investing in a dedicated wallbox offers significant advantages over relying on portable charging solutions. These benefits enhance the convenience and efficiency of EV ownership.
- Faster Daily Charging: A wallbox provides significantly quicker speeds, ensuring the vehicle is ready each morning.
- Fitur Cerdas: Many models offer app controls for scheduling charging sessions during off-peak electricity hours.
- Consistent Power: They deliver a higher, more consistent power output for reliable performance.
- Superior Convenience: For regular home use, a wallbox is the most convenient and effective option compared to public charging stations.
Catatan Penting: A Level 2 wallbox requires professional installation by an SEC-certified electrician to ensure safety and compliance with local regulations.
Step 3: Evaluate Your Home’s Electrical System

A safe and efficient installation depends entirely on the home’s existing electrical infrastructure. Before purchasing any equipment, an owner must confirm their system can handle the peningkatan beban of an EV charger. This evaluation is a non-negotiable step for safety and performance.
Checking Your Electrical Panel (Tablero Eléctrico)
The electrical panel, or electrical board, is the control center for a home’s electricity. It distributes power to all circuits and contains the main safety devices. A qualified electrician must inspect it to determine its suitability for an EV charger.
Assessing Main Breaker Amperage
The main breaker’s amperage rating indicates the total electrical capacity of the home. Many older homes in Chile have Panel 100-amp, which may not safely support the continuous high draw of a Level 2 charger. Modern homes with 200-amp panels typically have sufficient capacity. An overloaded panel presents significant dangers.
If you put in an EV charger and your panel is too small, breakers may trip a lot. Lights might flicker or there could be electrical fires. Panel yang berusia lebih dari 25 tahun may not meet safety standards and can pose fire risks when handling high loads.
Verifying Space for a New Dedicated Circuit
A Level 2 charger requires its own dedicated circuit to operate safely. This means there must be physical space in the electrical panel for a new two-pole breaker. Many panels are already full, making it difficult to add new circuits without a sub-panel or a full panel upgrade.
Waspada: Unlicensed work puts your home and family in danger. Always check for a license before starting any electrical job.
Monophasic vs. Triphasic Power (Monofásico vs. Trifásico)
Homes in Chile receive power through either a monophasic (single-phase) or triphasic (three-phase) connection. This distinction is the single most important factor determining the maximum possible charging speed at home.
Identifying Your Home’s Power Supply
An owner can often identify their connection type by looking at their electricity bill or inspecting the main breaker at the panel. A monophasic supply typically has a single large breaker, while a triphasic supply has a wider, three-pole breaker. However, a certified electrician should always make the final confirmation.
Impact on Max Charging Speed (7.4 kW vs. 22 kW)
A triphasic connection delivers power through three conductors instead of one, enabling much faster charging. This increased power delivery directly translates to substantially faster charging times.
| Fitur | Monophasic Connection | Triphasic Connection |
|---|---|---|
| Conductors Used | 1 | 3 |
| Max Charging Power | 7,4 kW | 11 or 22 kW |
| Kecepatan Pengisian Daya | Standar | Up to 3x faster |

A home with a monophasic supply can support a charger up to 7.4 kW. A home with a triphasic supply can potentially support a more powerful 11 kW or 22 kW charger, charging a compatible vehicle up to three times faster.
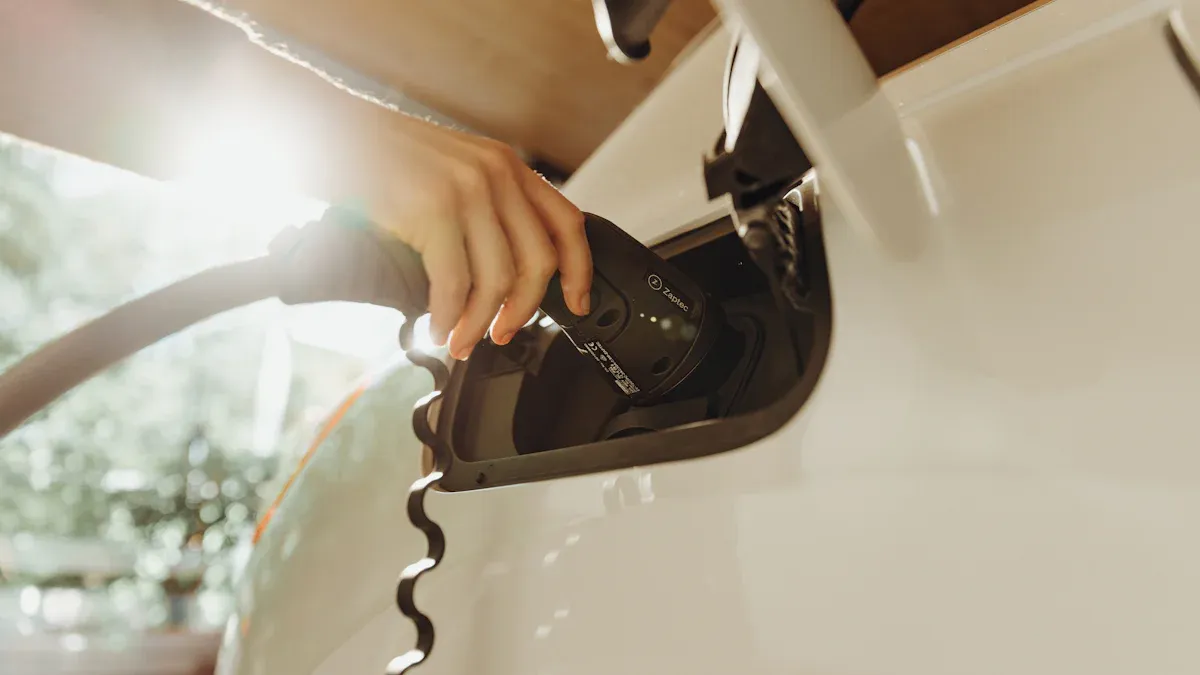
Step 4: Verify the Connector Type for Your EV

An owner must ensure their chosen charger is physically compatible with their vehicle. While this may seem obvious, different regions use different standards. Fortunately, Chile has adopted a consistent standard for home and public AC charging, which simplifies the selection process. Verifying the connector type is a quick but essential check.
The Type 2 (Mennekes) Standard in Chile
Why Type 2 is the AC Charging Standard
Chile has standardized the Type 2 connector, also known as Mennekes, for all AC charging. This decision aligns Chile with European standards and promotes interoperability across the country’s growing charging network. Nearly every new electric vehicle sold in Chile comes equipped with a Type 2 inlet for AC charging. This uniformity ensures that a home charger purchased from a reputable Chilean supplier will be compatible with most EVs on the road.
Differentiating from DC Fast Charging Connectors
It is important for owners to distinguish between AC and DC connectors. While the Type 2 connector handles AC charging at home, public stations offering rapid DC fast charging use a different plug. The most common DC connector in Chile is the Combined Charging System (CCS2). A CCS2 port on a vehicle looks like a Type 2 port with two additional large pins below it.
AC vs. DC Charging Ports 🔌
- AC Charging (Home/Public): Uses the top portion of the port (Type 2).
- DC Fast Charging (Public Only): Uses the entire port, including the two large bottom pins (CCS2). A home wallbox will only ever use the Type 2 connection.
Checking Your Vehicle’s Charging Port
How to Visually Confirm Your Port
An owner can easily confirm their vehicle’s connector type with a simple visual inspection. They should open the car’s charging flap and examine the port. The Type 2 inlet is a round connector with seven pins. Its distinct shape is easy to recognize. This visual check provides absolute certainty before purchasing any equipment. Consulting the vehicle’s manual also provides official confirmation of the port type.
Ensuring Charger and Cable Compatibility
Once an owner confirms their vehicle has a Type 2 port, they can confidently select a compatible home charger. All Level 2 wallboxes sold in Chile come with a tethered cable and a Type 2 plug, or they have a Type 2 socket for a separate cable. This standardization guarantees a perfect physical connection between the car and the charging station. An owner just needs to ensure the selected equipment explicitly states it uses the Type 2 standard.
Step 5: A Key Part of Choosing the Best EV Charger: Smart vs. Basic Features
After an owner confirms their vehicle and home compatibility, the next decision involves the charger’s intelligence. Modern technology splits home charging solutions into two categories: basic and smart. This choice between functionality and cost is a crucial step in choosing the best ev charger for long-term satisfaction.
Basic (Non-Smart) Chargers
Simple Plug-and-Charge Functionality
A basic, or non-smart, charger offers the most direct charging experience. Its operation is simple: the owner plugs the connector into the vehicle to start charging and unplugs it to stop. There are no apps, connectivity features, or advanced settings involved. This type of charger focuses solely on delivering power safely and reliably.
Lower Cost and Straightforward Use
The primary advantages of a basic charger are its lower initial cost and simplicity. For EV owners who just want to replenish their battery overnight without needing data or remote control, this option is highly effective. It provides essential Level 2 charging speeds without the complexity or expense of a connected device.
Smart Chargers (Wi-Fi/Bluetooth Enabled)
Smart chargers connect to the internet via Wi-Fi or to a phone via Bluetooth, unlocking a suite of advanced capabilities. These features provide greater control, efficiency, and safety.
Remote Control and Monitoring via App
A smart charger gives owners complete control through a smartphone application. This connectivity enables several powerful functions:
- Manajemen Jarak Jauh: Owners can start, stop, and schedule charging sessions from anywhere.
- Pembaruan Over-the-Air (OTA): The device receives software updates automatically, ensuring it stays current with new features and vehicle requirements.
- Diagnostik Jarak Jauh: Technicians can often diagnose and resolve issues remotely, reducing downtime.
Charge Scheduling for Off-Peak Rates
One of the most valuable smart features is charge scheduling. Owners can program the charger to operate only during specific hours, such as late at night when electricity rates are lowest. Taking advantage of these off-peak tariffs can reduce charging costs by up to 70%, delivering significant savings over the vehicle’s lifetime.
Energy Usage Tracking and Reports
Smart chargers provide detailed data on energy consumption. Through the app, an owner can view reports on their electricity usage, track charging expenses, and even monitor the carbon intensity of their sessions. This information is valuable for budgeting and understanding one’s environmental impact.
Dynamic Load Balancing for Safety
Utamakan Keselamatan: Penyeimbangan Beban Dinamis is a critical safety feature for homes with limited electrical capacity. It prevents dangerous overloads.
This advanced function continuously monitors the total electricity consumption in the home. If it detects that the total power draw is approaching the circuit’s limit, it automatically reduces the charging speed. This intelligent power management prevents the main breaker from tripping and avoids the need for expensive electrical panel upgrades, ensuring the system operates safely at all times.
Step 6: Research Brands and Certified Installers in Chile
Selecting the right hardware and a qualified professional is as important as understanding the technical specifications. An owner’s investment in a quality brand and a certified installer ensures long-term safety, reliability, and compliance with Chilean regulations. This step protects both the vehicle and the home.
Popular Brands for a Home EV Charger
The Chilean market offers several reputable brands. Many of these companies not only sell equipment but also contribute to the national charging infrastructure. An owner should research these options to find the best fit for their needs.
Kotak dinding
Wallbox is a globally recognized brand known for its compact, stylish, and smart chargers. The company offers advanced features like app control, power sharing, and dynamic load balancing, making it a popular choice for tech-savvy users.
Copec Voltex
A major player in Chile, Copec Voltex provides a comprehensive ecosystem. It operates a large public charging network and offers a robust home ev charger. Its integrated solution is a convenient option for many drivers.
Enel X Way
Enel X Way, the e-mobility division of the energy giant Enel, is another key provider. It offers a range of smart charging stations for home use and is actively expanding public charging stations across the country.
E-Mobility
E-Mobility is a specialized Chilean company focused exclusively on electric mobility solutions. It provides a variety of chargers and installation services tailored to the local market.
EV-Link
EV-Link offers another alternative for home charging equipment in Chile. Alongside established names, technologically advanced providers like TPSON also supply innovative charging solutions, giving consumers a wide array of choices.
Finding an SEC-Certified Installer
The installation of a Level 2 charger is not a DIY project. It is a significant electrical job that requires a licensed professional to ensure safety and legality.
The Role of the SEC (Superintendencia de Electricidad y Combustibles)
The SEC is the Chilean government entity responsible for overseeing the safety and proper functioning of electricity and fuel services. It sets the technical standards and regulations for all electrical installations, including EV chargers.
Why SEC Certification is a Safety Requirement
Hiring an SEC-certified installer is a legal requirement in Chile. This certification guarantees that the installer:
- Possesses the necessary knowledge of electrical codes.
- Follows mandatory safety protocols during installation.
- Is authorized to file the required TE1 declaration with the SEC.
Peringatan: An installation performed by an uncertified individual voids the charger’s warranty, may not be covered by home insurance, and poses a serious risk of electrical fire or equipment damage.
How to Verify an Installer’s Certification
An owner can and should verify an installer’s credentials before hiring them. The process is simple and provides complete peace of mind.
- Ask the installer for their professional license number or RUT (Rol Único Tributario).
- Visit the official SEC website.
- Use the online portal to look up the installer’s name or RUT to confirm their certification is active and valid.
Step 7: Understand the Installation Process and Costs
The final step involves understanding the practicalities of installation and budgeting for the associated costs. A professional installation is a multi-stage process that ensures the home charging solution is safe, compliant, and efficient. Knowing what to expect helps an owner navigate this phase smoothly.
Apa yang Diharapkan Selama Instalasi
A certified installation follows a structured, four-part process from initial contact to final certification. Each stage is critical for a successful outcome.
Site Assessment and Quote
First, a certified electrician visits the home to perform a site assessment. The electrician inspects the electrical panel (electrical board), determines the best location for the charger, and plans the wiring route. Following this evaluation, the owner receives a detailed quote outlining all labor and material costs.
Wiring from Panel to Charger Location
Once the owner approves the quote, the installation begins. The electrician runs a new, dedicated circuit from the electrical panel to the chosen charger location. This work often involves routing heavy-gauge wiring through conduit to protect it and comply with safety codes.
Charger Mounting and Final Testing
Next, the electrician securely mounts the wallbox to the wall. They then connect the new wiring to the unit. After the physical installation, the electrician performs a series of tests to confirm the charger receives the correct voltage and operates safely.
Filing the TE1 Declaration with the SEC
The final and most important step is the legal registration. The SEC-certified installer files a TE1 Declaration (Declaration of Electrical Installation) with the Superintendency of Electricity and Fuels. This document certifies that the installation meets all Chilean electrical regulations, making it legal and ensuring the warranty is valid.
Estimating Costs in Chile
The total cost includes both the peralatan pengisian daya and the professional installation service. While prices vary, an owner can create a realistic budget by understanding the key cost factors.
Typical Cost Range for a Standard Installation (CLP)
For a standard installation in Chile, where the charger is relatively close to the electrical panel and no major upgrades are needed, an owner can expect the cost to range from CLP $350,000 to CLP $700,000. This estimate typically covers labor, wiring, conduit, a new breaker, and the TE1 filing.
Variables Affecting the Final Price
Several factors can significantly influence the final installation price. An owner should discuss these variables with their installer during the site assessment.
- Jarak ke Panel: A longer distance between the electrical panel and the charger increases costs due to the need for more wiring and labor.
- Kompleksitas Instalasi: Difficult wiring routes, such as those requiring trenching or drilling through concrete, will raise the price.
- Jenis Pengisi Daya: The brand and model of the chosen charger can affect costs, as some units have specific installation requirements. While home charging is convenient, the availability of public charging stations and a robust charging network can influence an owner’s decision.
Key Cost Influencers 💰 The final quote depends heavily on the home’s specific conditions. Upgrades to the existing charging infrastructure, like a new panel, represent the most significant potential expense.
Potential Costs for Electrical Panel Upgrades
Jika penilaian situs mengungkapkan bahwa panel listrik rumah tidak memiliki kapasitas atau ruang yang cukup, peningkatan diperlukan. Pekerjaan ini dapat berkisar dari menambahkan sub-panel hingga mengganti panel utama seluruhnya. Peningkatan ini dapat menambah CLP 200.000 hingga lebih dari CLP 1.000.000 ke total biaya proyek, tergantung pada kompleksitasnya.
Memilih pengisi daya ev terbaik memerlukan pendekatan yang metodis. Keputusan akhir pemilik harus menyeimbangkan kapasitas kendaraan, sistem kelistrikan rumah, dan fitur yang diinginkan. Mengikuti tujuh langkah adalah kunci untuk memilih pengisi daya ev terbaik.
Pemilik harus selalu mempekerjakan profesional bersertifikat SEC untuk instalasi yang aman dan sesuai peraturan.
Berinvestasi pada pengisi daya ev rumah yang tepat menyempurnakan infrastruktur pengisian pribadi. Langkah ini memaksimalkan kenyamanan memiliki kendaraan listrik. Proses memilih pengisi daya ev terbaik memastikan kepuasan jangka panjang dengan pengisi daya yang dipilih.
PERTANYAAN YANG SERING DIAJUKAN
Dapatkah saya memasang pengisi daya EV sendiri di Chili?
Tidak. Hukum Chili mengharuskan teknisi listrik berlisensi bersertifikat SEC untuk melakukan instalasi. Pemilik harus mempekerjakan profesional untuk memastikan instalasi aman, sesuai peraturan, dan garansi produk tetap berlaku.
Bagaimana jika rumah saya hanya memiliki daya monofase?
Rumah dengan koneksi monofase dapat mendukung pengisi daya Level 2 hingga 7,4 kW. Kecepatan pengisian ini lebih dari cukup untuk mengisi penuh sebagian besar kendaraan listrik semalaman, memenuhi kebutuhan berkendara harian yang khas.
Apakah pengisi daya 22 kW selalu merupakan pilihan terbaik?
Belum tentu. On-Board Charger (OBC) kendaraan membatasi kecepatan pengisian maksimum. Pemilik harus memilih pengisi daya yang sesuai dengan kapasitas OBC mobil mereka untuk menghindari membayar daya yang tidak dapat digunakan kendaraan.
Berapa lama waktu yang dibutuhkan untuk instalasi standar?
Instalasi standar biasanya memakan waktu antara empat hingga delapan jam. Waktu pastinya tergantung pada faktor-faktor seperti jarak dari panel listrik ke lokasi pengisi daya dan kompleksitas rute kabel.
Apa itu Deklarasi TE1 dan mengapa itu penting?
Deklarasi TE1 adalah dokumen hukum yang diajukan oleh instalator bersertifikat SEC setelah instalasi. Dokumen ini menyatakan bahwa pekerjaan mematuhi semua kode keselamatan kelistrikan Chili. Dokumen ini penting untuk asuransi, garansi, dan kepatuhan hukum.
Apakah saya benar-benar membutuhkan pengisi daya pintar?
Pengisi daya dasar bekerja dengan sangat baik untuk pengisian. Namun, pengisi daya pintar menawarkan fitur berharga seperti penjadwalan jarak jauh untuk menggunakan tarif listrik di luar jam sibuk. Kemampuan ini dapat menghemat biaya secara signifikan seiring waktu.
Dapatkah saya menggunakan pengisi daya portabel yang disertakan dengan mobil saya setiap hari?
Pemilik dapat menggunakan pengisi daya portabel Pengisi daya level 1 setiap hari, tetapi sangat lambat. Hanya menambah jarak tempuh 5-8 km per jam. Wallbox Level 2 yang dipasang secara profesional adalah solusi yang direkomendasikan untuk pengisian harian yang efisien dan nyaman.